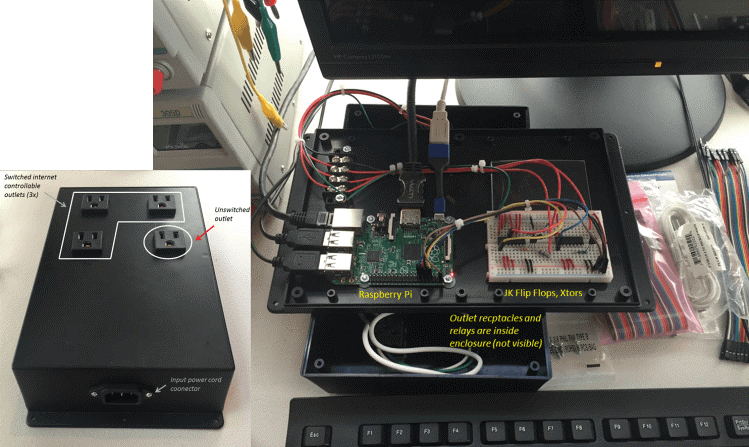
If the 2016 Washington DC Maker Faire could be summed up in two words, they would be ingenuity and resourcefulness. The joint labor of passion and creativity present at the event is difficult to miss, showcased in each exhibit from a DIY 3D printer to an Internet-connected Foosball table. Amongst them all, one of my favorites was Rounok Joardar’s Etherlux, an IoT power outlet constructed from off-the-shelf components.
“Compared to Apple’s Homekit t or Google's Nest, which will then force you to buy products that are compatible with them, the Etherlux controls the power directly. Whatever appliances you have at come can be plugged in, and anything that can be plugged in can be controlled,” Rounok said to Electronic Products.
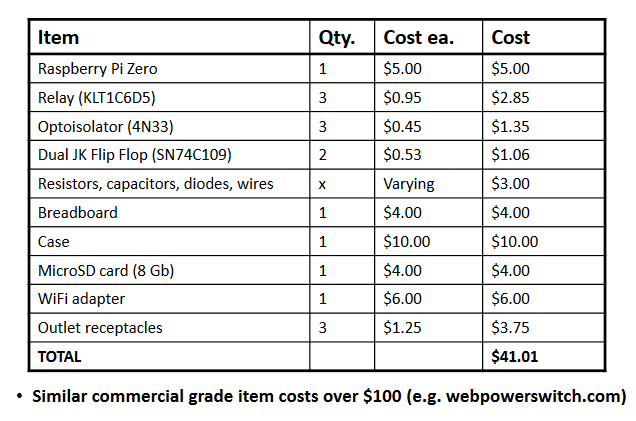
Rounok designed his Etherlux with the goal of building a practical, low-cost alternative to the more expensive commercial grade Internet controlled outlets. For context, the total bill-of-materials for the Etherlux is exactly $41.01 when purchased in bulk; whereas, a similar device called the Web Power Switch runs for $100. The most expensive item in Rounok’s design wasn’t even component-related, but the $10 exterior chassis.

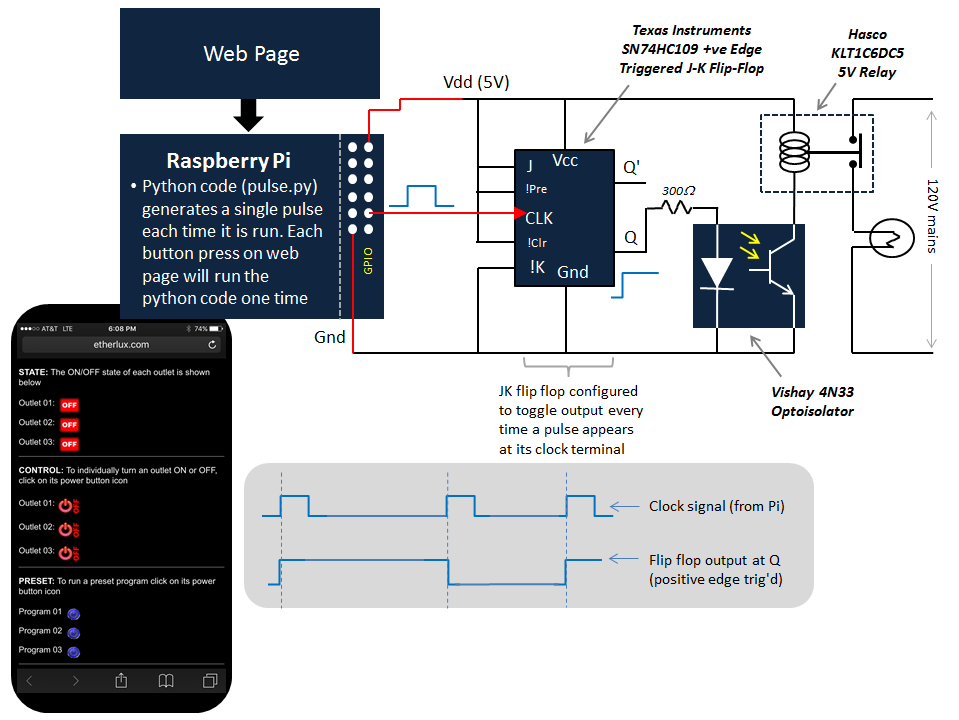
Fundamentally, Etherlux is a Raspberry Pi Zero running an Apache web server to control a logic block that’s connected to the power electronics circuitry. Low cost aside, the device grants users to ability to remotely control an outlet’s on/off operations, along with more complex operations such as timed on/off, duty cycle control, and complementary behavior.
To operate the device, users must visit a specific web page and click the URL corresponding to the desired command. Once clicked, a PHP request is sent to the web server running the Pi and a local Python script is triggered.
Executing the script generates a one-second signal pulse on one of the Pi’s GPIO port (either 4, 17, or 27) set up as an input port. The pulse is then transmitted to the clock input of a dual J-K flip flop configured in toggle mode so that its output controls the ON/OFF state of an electric relay connected to the main 110V outlet. The ON/OFF state of the outlet is sensed by tapping the voltage at the midpoint of a 300-ohm resistor linked to the optoisolator associated with the outlet — very straight forward and logical.

The instructions, as well as the PHP code used in the project, are both available on Rounok’s website for those who wish to pursue their own Etherlux. A future update will add password protection and additional customization features.
Advertisement
Learn more about Electronic Products Magazine


