By Nicole DiGiose, content editor
These days, it seems that our constantly upgrading, tech-fascinated culture tells us to discard aging electronic devices the moment a newer version makes the scene, even if our older gadgets are in good condition. But why waste something that’s still useful? If you don’t want two similar devices and plan on chucking the earlier version, know that there are plenty of ways to get creative in recycling, instead of adding to the growing pile of e-waste. Check out the ideas below and, who knows, maybe you’ll get started on a fun, new project.
Build your own wireless internet radio from an old router
Although radios and routers aren’t exactly technologies of the future (they’re quite the opposite, as times are-a-changin’), when you combine the two with the internet, you could make a nifty little device for streaming music. The process is fairly simple, and all you really need is a specific wireless router (the Asus WL-520GU is recommended) along with a USB sound card. Check out the video below for the instructions you need to build your own wireless internet radio (you can even control it with your smartphone). You have to admit, this would be a cool creation to show off.
Use an old PC fan to create a mini battery-charging wind turbine
Do you like hacking and tinkering and sustainable energy? Then this project is calling your name. If you’d like to recharge your batteries without relying on an outlet, look into building a wind turbine out of an old PC fan. To start, of course you’ll need a PC fan (the bigger the better, as they say, at least when it comes to wind turbines), a thick plastic bottle, an old CD, some wire, Schottky diodes, and miscellaneous craft supplies. Also note that soldering is involved, so make sure you know how to solder. Beyond that, it’s quite a simple hack, and surprisingly, you won’t use your PC fan’s blades in your final turbine, but instead cut up the bottle to create blades and glue them onto the fan’s motor.
Of course, this won’t power your house, but if you’re looking to get busy with a new project that will save you a few wall outlets, this will do a fantastic job of recharging batteries on your power-hungry devices. Soon enough, you’ll have power wherever the wind blows. For full instructions, check out Instructables, and watch the video below to see the wind turbine in action.
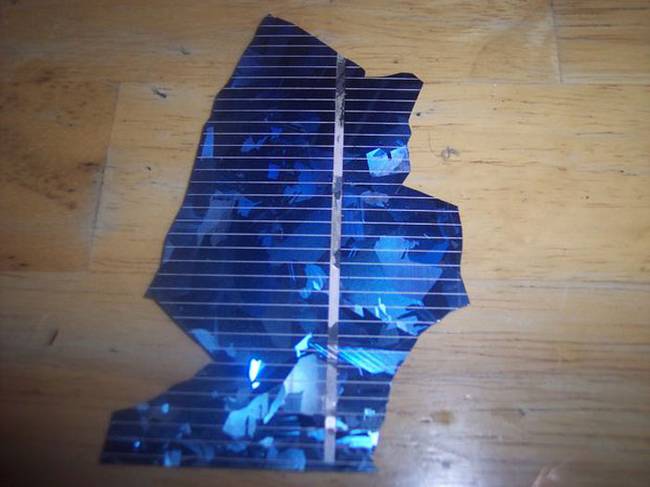
Make a 35-watt solar panel out of broken solar cells
Attention, attention! Shattered solar cells don’t have to become e-waste! Before you begin this environmentally friendly project, note that it’s adaptable, being that it depends on the amount and size of the solar cells you have handy.

Created by Instructables user mattfelice, you’ll need a few things for solar cells, including the following:
- 15- to 25-watt soldering iron
- Light-duty 60/40 electronics rosin core solder (you can use a silver solder)
- Multi-meter
- Pencil eraser
- Solar tabbing pre-tinned ribbing
- A flat, sturdy working surface
To begin, you want to separate your cells in similar sizes, and remember that if you’re wiring a group of cells together in a series, the smallest cell in the circuit will dictate your panel’s amperage. Typically, the bigger the cell, the more amperage you’ll get.
Next, you’ll have to determine if each cell has tabbing on the busbar. If not, use a pencil eraser to clean the surface of the busbar — the more you use the eraser, the better.
When that’s done, you must tin your soldering iron with a piece of solder and wait a few seconds until it stops smoking. Afterwards, cut a piece of tabbing and use your soldering iron to melt the tabbing into the tinned busbar, and continue to do the same for the rest of your cells. Then solder a lead to the back of each cell.
After you have your leads soldered to your cells, you can begin wiring the cells in series. The tab soldered to the back of each cell will now be used to connect to the front of the next cell. Line them up and melt the tabbing from the underside tab on one cell to the top of the next cell. Keep doing this, and get as many volts as you want. If you don’t plan on using a charge controller, you’ll need to install a reverse-flow diode on the positive side to prevent the batteries from draining.
For step-by-step instructions, head to the original maker’s page on Instructables.
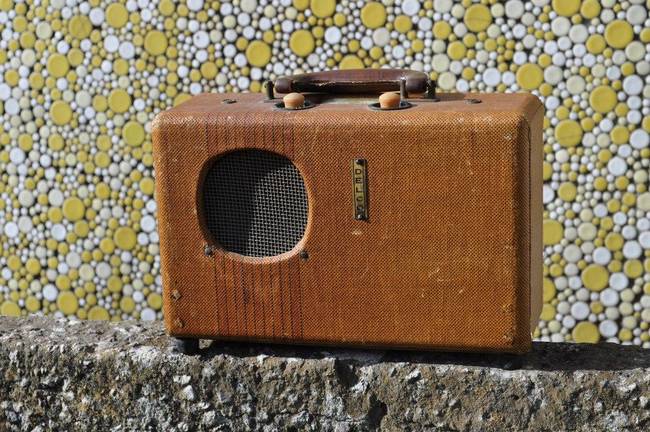
Transform your antique portable radio into a modern Bluetooth speaker
This is another fun project for the music-loving engineer. If you have an antique radio collecting dust in the attic or come across one at the flea market, give it a second chance by making it into a Bluetooth speaker. Yes, old devices can learn new tricks. Once transformed, this rocking gadget can pair with your smartphone or iPod and play your tunes wherever you take it.

Originally made by Instructables user ke4mcl, at the bare minimum, you’d need a working Bluetooth speaker and a portable radio, although a few more items are recommended. For the battery, a 3.7-V lithium extended-capacity phone battery is recommended, which, according to ke4mcl, should give you about 10 hours of play time between charges. For the speaker, you can use a driver yanked from an old surround sound system.
To get started and to read more about swapping out parts, check out these step-by-step instructions.
Take that old cell phone out of the junk drawer and use it to power a robot
Before you ditch last year’s phone for that new sleek one with a slightly better camera, know that it has enough power to create a personal robot. What kind of personal robot, you might ask? Something called a cardboard truckbot.
Obviously, you’ll need additional parts for this creation, and fortunately, they’ll only cost you about $30 (which is pretty darn good for building a robot). Here’s what you’ll need for a remote-controlled, GPS-equipped, text-to-speech-talking, roaming robot:
- Bare bones Arduino (or a slightly more expensive fully assembled one to save you time)
- Micro servo
- Hex inverter (handles 3.3-V to 5-V conversion if you aren’t using a 3.3-V Arduino — a Sparkfun logic level converter is also an option)
- HTC USB connector
- Mini breadboard
- Rear caster
- Miscellaneous cardboard, strap ties, and wires
To see the little bot in action, watch the video below.
Click here for step-by-step instructions.
Are you interested in building any of these gadgets with your aging devices? Have you ever re-used older technology to make it new again? Let us know — leave a comment below.
Advertisement
Learn more about Electronic Products Magazine


