How to make homemade, kid-friendly batteries
Constructing projects at home with our children is a great way to bond and spend time together, but sometimes we’re short on time or ideas. Alas, we’re here to help bring back the good old days of grade school projects that are easy and informative.
What types of projects can we create?
You may remember creating similar projects with your parents at home or with teachers at school. There are several types of intriguing science projects, but some of the most popular include the Vinegar Battery, the famous potato battery, and the Spare Change Battery.
The Vinegar Battery
The Vinegar battery project is a great way to learn how to build a basic battery using everyday household materials. This particular build comes from hilaroad.com; the materials you will need are: a piece of 14 gauge copper wire (any copper wire will do), a galvanized nail, a small container, and vinegar.

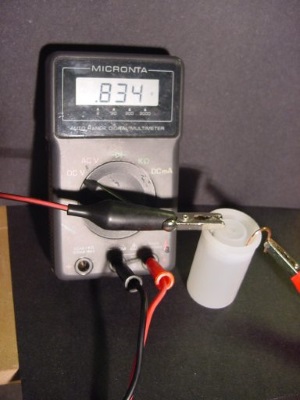
The steps to build one are pretty simple: Fill your chosen container nearly to the top with vinegar. Next, stretch tape across the top of the container so the copper wire and galvanized nail can be poked through and suspend on the opposite ends. Once that’s complete, you may hook up a volt meter to each “terminal” to read out the voltage. On average, you should see about .834 volts.
Pro Tip: If the volt meter gives a negative readout, it means you have your leads backwards, but at least this tells you which terminal is “+” and which is “-“.
The Potato Battery
Constructing a potato battery is as stress-free as the vinegar battery and can also be made using everyday household items. The materials you need include: a galvanized nail, a copper wire, a potato, and a volt meter.

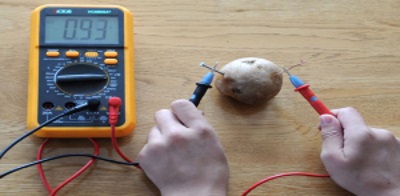
You may have noticed a common theme here with the use of zinc, copper and an electrolyte (the latter here being the potato). Start this exercise out by inserting your piece of copper and nail in the potato, close to one another. After that, all you have to do is hook up your volt meter to see that it’s producing a visible, yet weak voltage. To bump your voltage and light the LED, you may need to connect multiple potato batteries in a series for additional voltage. In case you’ve considered using other fruits and vegetables, bear in mind that the experimenters from miniscience.com have already observed that even with other produce, a single item doesn’t produce enough juice to illuminate a bulb.
The Spare Change Battery
The final battery can be summarized as slightly more difficult, but accessible; again, the materials may be found around your home. You will need 10 pennies, all newer than 1982 to capture their high zinc content, sandpaper or a sander, a strip of cardboard the width of the pennies, a small piece of tin foil, and vinegar.

The first step is to grind the copper off of one side of the pennies using your sandpaper or sander. Next, cut the cardboard so a penny will fit on it; repeat nine more times. After, dip the cardboard in the vinegar and place the penny copper side down on the tin foil with the cardboard sandwiched on top. Touching the terminals of the volt meter to the cardboard and tin foil should yield a reading of around .6 volts. Continue to sandwich the pennies and cardboard in the same way until you have a penny zinc (silver) side up. Test with your volt meter again, and you should get a reading closer to 5-6 volt. Impressive, right? That’s more than enough to run an LED for a couple of days, according to the makers of this battery.
Each of these projects is an excellent way to learn how electricity works, while encouraging safe experimentation. I hope you enjoyed them and stay tuned for more kid sized science experiments.
Advertisement
Learn more about Electronic Products Magazine


