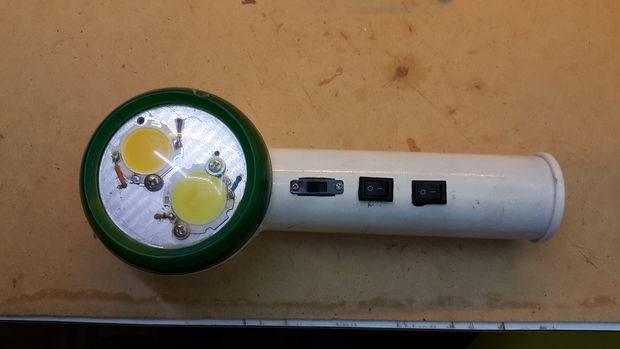
How often have you had to search endlessly for batteries when your flashlight unexpectedly died? Instructables user shahrokhani found the solution to this common dilemma by making his own powerful rechargeable flashlight and shared instructions with the rest of us. Along with the ability to recharge, the flashlight also includes the option of a light pulsing for safety purposes.
While the craft requires some basic knowledge of wiring electronics, as well as specific rechargeable batteries, the final version displays a strength that is unparalleled with a brand-name flashlight.
Materials Needed:

Tools Needed:
- Soldering iron
- Drill
- Cutter
First, cut a hole for the three switches into the piece of PVC pipe. One switch’s function will be to charge batteries, while the second will be used to switch on the flashlight. The last one will switch on the red blinking LEDs.
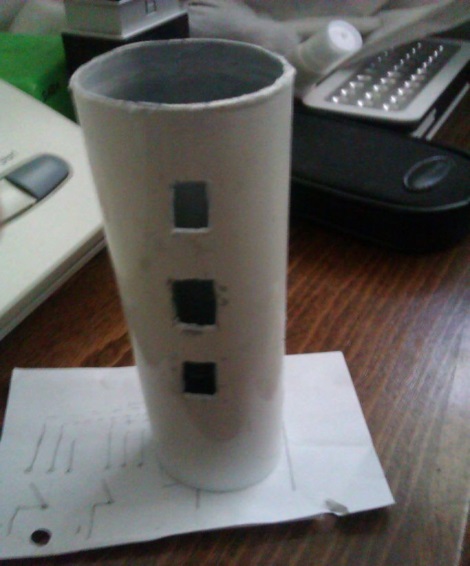
Next, paint the pipe in a color to match your cream container. When the paint has dried, you should place the bottom of the pipe against the container to trace a circle. Use a hot nail to make holes along the container’s circle, as shown below.
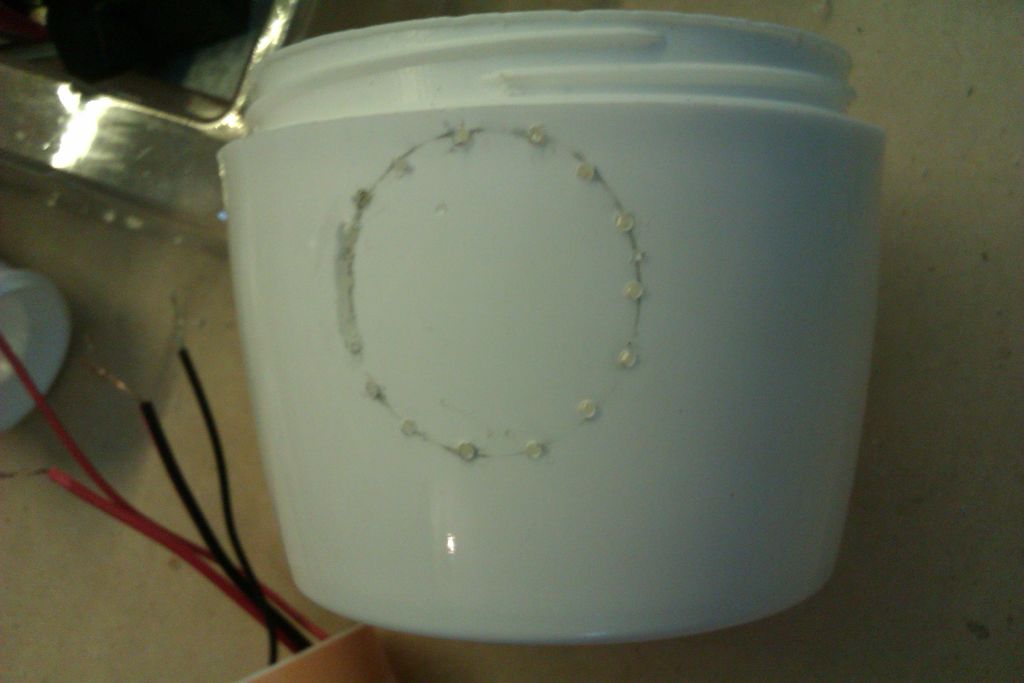
Use a small piece of electrical duct tape as a battery holder, gluing it inside the pipe to secure it. Then, insert the pipe inside the container and glue the two components together. Positioned at the bottom of the pipe, two rechargeable 9-V batteries will then fit into place and connect in a series.
After marking the small holes for the wires and screws of COB (chip-on-board) 5-W LEDs on the aluminum circular plate, attach the screws to the plate and wire a connection to the two LEDs. A COB LED is an LED diode that is directly built into a special circuit board, presenting a fairly new kind of technology that’s known for “fluctuating voltage systems.”
When making the wire connections, the lights should be connected in a parallel way so that they each receive 18 V. Use the diagram below as a reference for building the circuit; be sure to have inserted the switches in the correct openings.
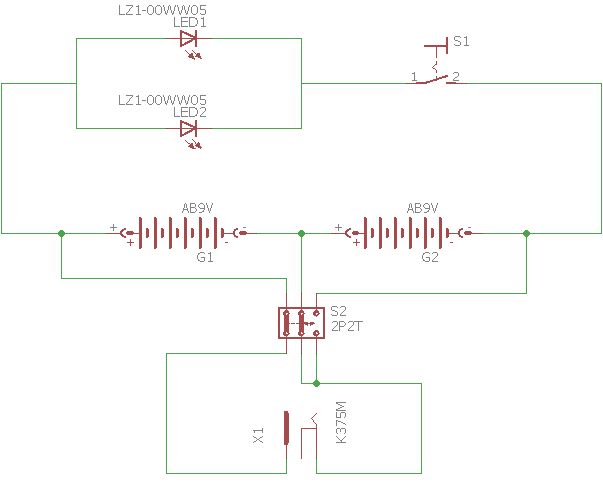
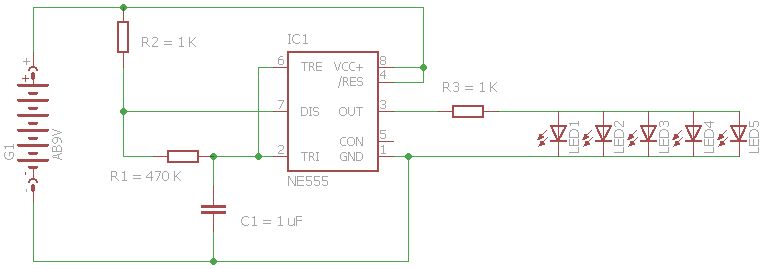
Now, connect the DC charging jack to your cap, and then plug it into the bottom of the flashlight device. Using the diagram of blinking LEDs, hook up the wires on the perforated board before soldering all of the board’s components. Remember to make holes on the container to connect positive and negative poles to the board.
Below, the creator shares the final product, demonstrating the strength of the flashlight’s glow.
Providing a resolution for the most common of household malfunctions, the DIY flashlight may take some time to construct and require some careful observation of battery wires. However, the satisfaction of having a homemade rechargeable device is enough to make the extra effort worth it.
Source: Instructables, 12Vmonster
Advertisement
Learn more about Electronic Products Magazine


