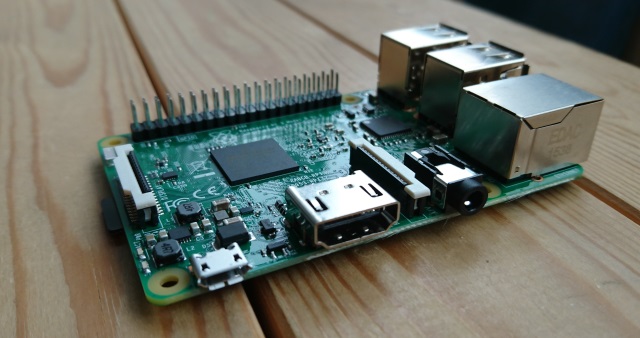
The Raspberry Pi is one of the best kits available, offering an affordable diversity of options to users of all levels. This credit-card-sized wonder is available worldwide and can do so many things — except, of course, boot from USB.
Luckily, that’s no longer the case. Users of the Raspberry Pi 3 can now ditch the microSD in favor of a USB device, including USB adaptors, USB hard disk drives, an SSD with USB adaptor, and even a flash stick.

Getting started
As with any new project, it is important to begin with up-to-date versions of programs, so make sure you’ve got the latest Raspbian installed. Then, follow all instructions to remove the card from your machine and put it into the Raspberry Pi, which should be powered down. Next, boot the Raspberry Pi and remote connect over SSH as soon as it is loaded.
Next steps
After you’ve signed in, run these commands, which will replace the default (start.elf and bootcode.bin) files:
sudo apt-get update
sudo BRANCH=next rpi-update
This will deliver two files into the /boot directory and, upon download, enable the USB boot mode with these commands:
echoprogram_usb_boot_mode=1|sudotee-a /boot/config.txt
This will add the program_usb_boot_mode=1 instruction to the end of the config.txt file.
Next, reboot the Raspberry Pi and ensure that the one-time programmable memory has been changed. To check this, use:
vcgencmd otp_dump|grep17:
Assuming that the result is representative of the address 0x3020000a, you can assume that everything is working properly.
Just like that, your Raspberry Pi is USB boot-enabled, so feel free to remove the program_usb_boot_mode=1 line from your file, should you need to use the same microSD card in another board later on.
Preparing your device
You’ll want a formatted USB stick to connect to your spare port. Next, copy the OS across and identify your USB stick by using lsblk. When you’ve established the name of your USB stick, unmount the disk and create a 100-MB partition and a Linux partition using the parted tool:
sudoumount /dev/sda
sudoparted /dev/sda
When prompted, enter:
mktable msdos Should you get a message suggesting that the disk is engaged elsewhere, select ignore. As long as you’re using a disk that can be deleted or formatted, this shouldn’t cause an issue. If you have a problem at this phase, you may need to switch to the desktop to affirm that the disk is unmounted. Then, use the following: mkpart primary fat32 0% 100M mkpart primary ext4 100M 100% The information output will be related to disk and new partitions. Next, exit parted by using Ctrl+C before creating the boot filesystem as well as the root filesystem:
sudo mkfs.vfat -n BOOT -F 32 /dev/sda1
sudomkfs.ext4 /dev/sda2
Finally, mount the target filesystems and then copy your current Raspbian OS to your USB device.
sudomkdir /mnt/target
sudomount /dev/sda2 /mnt/target/
sudomkdir /mnt/target/boot
sudomount /dev/sda1 /mnt/target/boot/
sudoapt-get update ;sudoapt-getinstallrsync
sudorsync-ax --progress / /boot /mnt/target
The final line is the last command and it will copy everything over, which may take some time. When it’s finished, refresh the SSH host keys, thereby maintaining a connection with the reconfigured Raspberry Pi after reboot.
cd /mnt/target
sudomount --bind /dev
devsudomount--bind /sys sys
sudomount --bind /proc proc
sudochroot /mnt/target
rm /etc/ssh/ssh_host*
dpkg-reconfigure openssh-server exit
sudoumount dev
sudoumount sys
sudoumountproc
During this time, the user will change from pi@raspberrypi to root@raspberrypi until the exit on line 8.
USB prepare for reboot
You’re almost there! Edit cmdline.txt again by using the following:
sudosed-i"s,root=/dev/mmcblk0p2,root=/dev/sda2,"/mnt/target/boot/cmdline.txt
Also, change this on the fstab:
sudosed-i"s,/dev/mmcblk0p,/dev/sda,"/mnt/target/etc/fstab
Now, unmount the filesystems before it is time to shut down the Raspberry Pi:
cd ~
sudoumount /mnt/target/boot
sudoumount /mnt/target
sudopoweroff
After your Pi has powered down, remove the power supply and then the SD card. Finally, reconnect your power —you should find that your Raspberry Pi is booting from your USB device.
Source: MakeUseOf
Advertisement
Learn more about Electronic Products Magazine


