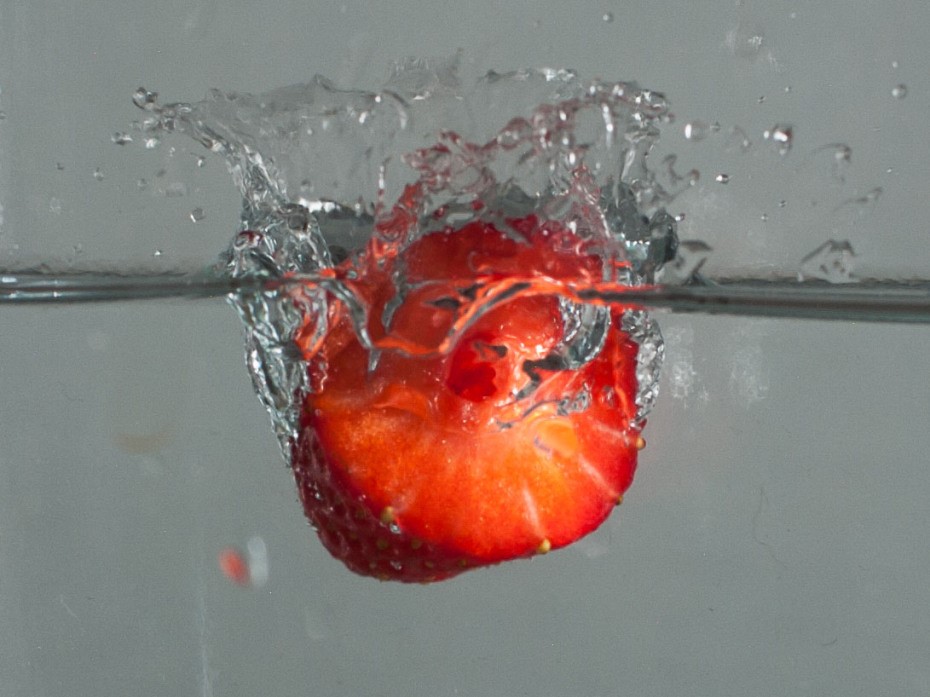
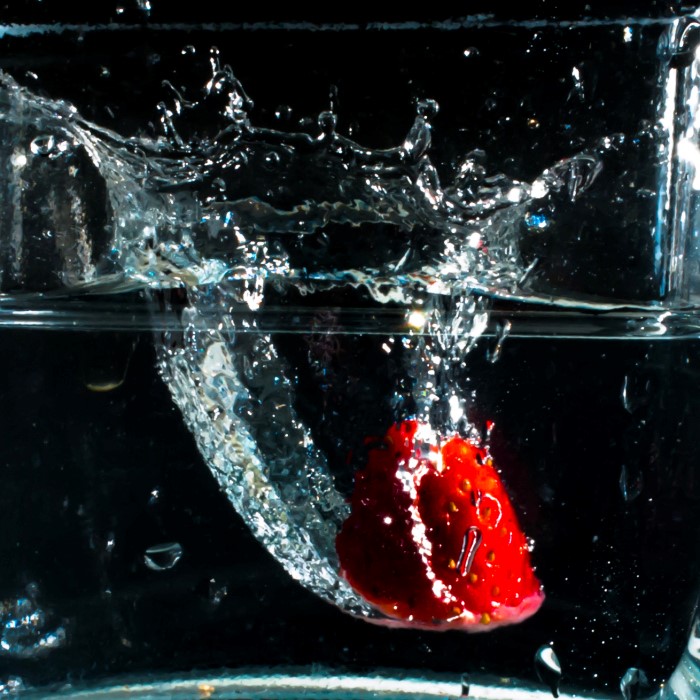
I’ve once been told that food is the best way to get to someone’s heart. But I disagree — what if I were to tell you that that idiom is just a piece of 1950s-sounding hogwash, and that high-speed splash photograph of raw ingredients is really the way to get to someone’s heart. I’m talking about creating a DIY high-speed flash photograph rig set up with an Arduino, to wow your partner by capturing dramatic photographs of fruits and vegetables at the exact moment of impact when they splash through the surface of water, sending droplets everywhere. Yeah, that should definitely impress them, and if not, well, you’ve just learned how to build a high-speed photography rig that can be used to capture and sell fancy pictures.
This particular project is rooted in the ambitions of the physicist and maker duo Thomas Burg and Johannes Gottwald, who sought to automate the triggering of the camera’s flash at precise moment of impact to eliminate the trial-and-error approach of taking rapid fire pictures in hopes of capturing something good.
To do this, the two build a relatively simple mechanism reliant on two pairs of 2 x 4’s, two aluminum plates with an overlapping hole cut out into each, an electromagnetic solenoid connected to a power supply, an Arduino Uno with a Relay Shield, and a standard breadboard. The plans outlined below do not cover each aspect in full — you’ll have to experiment a bit on your own — but they provide enough detail to teach you how to conceptualize the project as well as program its electronics.
Step A: Building the frame
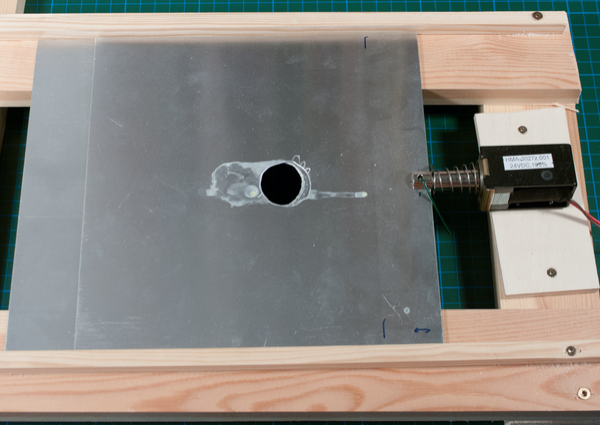
Begin by cutting a hole in the first aluminum plate at the intended location of drop off. Ensure the hole is large enough for the object being dropped to fit, before placing the second aluminum plate beneath to cut a duplicate hole at the exact same position.
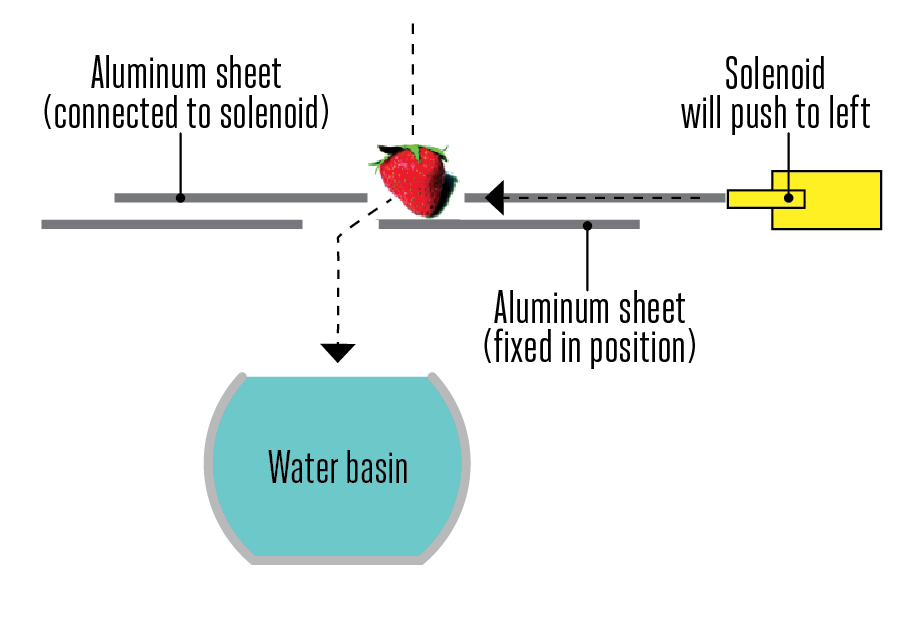
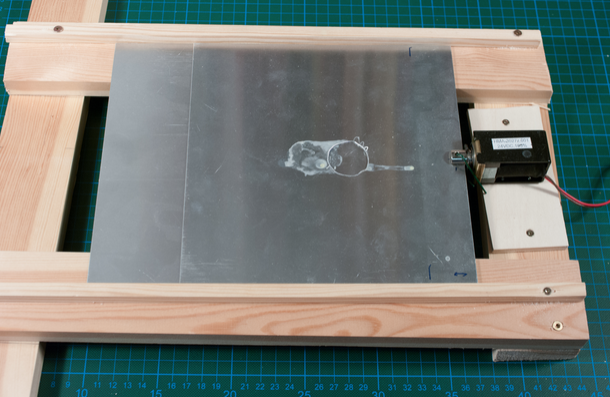
Next, build a simple wooden frame made from two pairs of parallel 2 x 4’s as depicted below. Add a thinner pair of parallel rails atop to ensure the aluminum plates can only glide in one direction when pulled by the solenoid.
Step B: Mount the solenoid
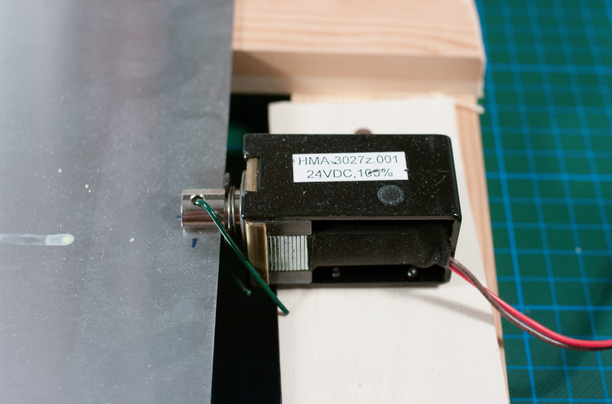
Mount the solenoid on a chunk of wood to raise the device (two inches) to the height of the aluminum plates. Attach the top plate to the grove in the solenoid’s plunger to allow it to slide the top plate back and forth when a signal is sent from the Arduino.
Step C: Test the dropper
Attaching the solenoid to the power supply will cause the magnet within the device to push or pull the plunger. Ideally, you’ll want to manually control it with the breadboard setup using a pushbutton switch and fuse as we’ll discuss further down. Nevertheless, the plates must be adjusted so that their holes align once the plunger is pushed by the solenoid as this allows us to control the exact timing of when the object falls.
Step D: Assemble the electronics
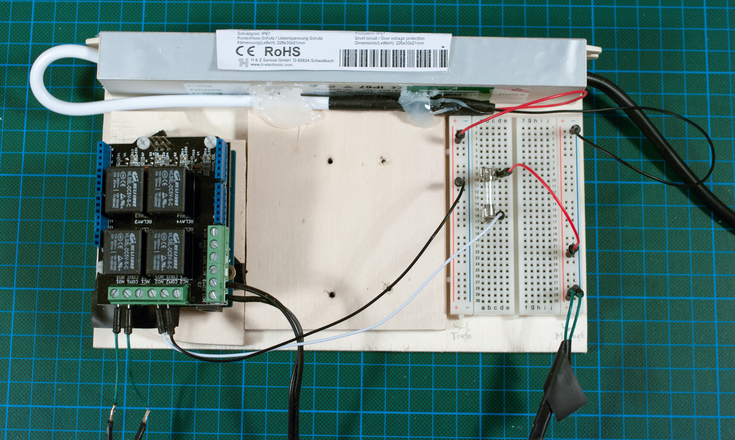
Considering the circuit is made up of the Arduino Uno that controls the solenoid, a breadboard that provides fuse protection, and a power supply to drive the whole operation, fastening all three components onto a single frame is highly recommended. Once this is finished, plug the Relay Shield into the Arduino Uno and run jumper wires from the Relay #2 to the breadboard as depicted by the black and white wires below; these control the solenoid. To trigger the flash, we link Relay #3 to the breadboard. Finally, attach the power supply, taking care to lead the DC output to the breadboard so that power can be driven through Relay #2 and the fuse before finally reaching the solenoid.
Step E: Program the Arduino
Here comes the easy part. Simply download the project file PhotoMagnet.ino and upload it into the Arduino to control the timing variables needed to properly take the splash shot. Once this occurs, you’ll be prompted to enter some necessary variables in the code below.
int delay_before_magnet=1000,delay_after_magnet=300;
int flash_duration=10;
int magnet_duration=50;
int camera_duration=0;
The default variables set the flash timing to occur 300 milliseconds after the relay has trigger the solenoid to push the aluminum plate, causing the holes to align and the object to start falling a distance of 0.5 m (20 inches). You will need to adjust the 300 milliseconds to the duration it takes the object to break the water’s surface depending on the specific height of your project. If the “fire flash” and “fire magnet” actions do not occur, go back and verify your wiring.
Step F: Take the splash shot
Set the camera to manual and place it in a position where it looks upon the water’s surface. Play around with the exposure time and flash intensity by taking test shots of floating objects. Once you’re satisfied with the lighting proceed to work on the timing.
Gottwald and Burg recommend that we abide by the follow sequence:
1. Start the Arduino program and enter the first value
2. Push the top aluminum plate into the slot on the solenoid’s plunger to load the right
3. Place the intended object on the hole in the plate
4. Finish entering the values
5. Hit the camera shutter button
6. Press enter to start the sequence
Step G: Troubleshoot
Pay attention to timing to determine whether the flash fired before the object reached the water or the object splashed too soon. Adjust the timing variables as necessary until the flash captures the splash at the moment of impact.
Step H: Take lots and lots of photos
Roll with it and have fun. Once the correct timing is established, everything will be smooth sailing so long as the height between the dropper and the water remains constant.
Source: Makezine
Advertisement
Learn more about Electronic Products Magazine


