The Amazon Echo is quickly gaining traction as the premier virtual assistant of sorts that takes reminders and notes, perform unit conversions, check sports scores, control smart applications in your home, play audiobooks, check the weather, and much more—you get the point. But why pay $150 for the deluxe version when $35 is all it takes to build your own, especially when you’re not even sure if you’ll use the device?
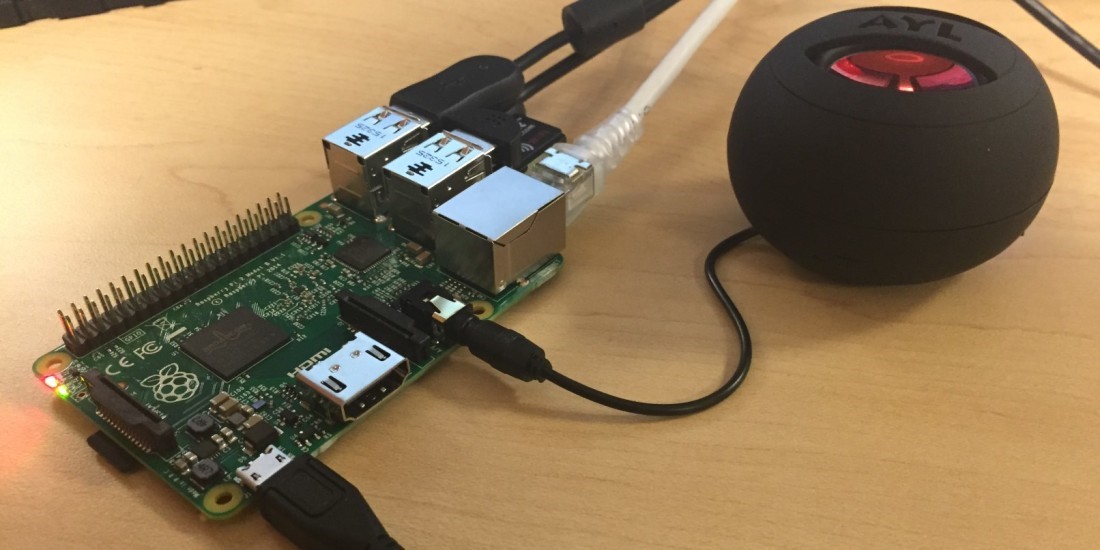
By the end of this guide you’ll have yourself a device comparable to Amazon’s official echo, perhaps with slightly less aesthetically pleasing enclosure. The best part is that sites like If This Then That make it incredibly easy to update your creation with new apps that automate your home and make it smart. $35 is a relatively safe risk for experimenting with home automation. Save for the Raspberry Pi 3 itself, all you need are the following items:
- 1x Raspberry Pi 3 or 2 (a USB Wi-Fi adapter is required with the model 2) with Raspbian installed
- 1x MicroUSB power cable
- 1x an 8GB MicroSD card
- 1x USB Microphone
- Speakers
- Keyboard and mouse
Essentially, the DIY Echo is built by installing the Amazon Alexa Skills Kit onto the Raspberry Pi, using Amazon’s official code. Alexa will need to be restarted each time you boot the PI.
Step One: Register for an Amazon Developer Account and create a profile for your DIY Echo
- Log into your Amazon Developer Account
- Click the Alexa tab
- Click “Register a Product Type” > “Device”
- Name the device type and its display name (Writing “Raspberry Pi” will suffice)
- Proceed to the Security Profile Screen, and click “Create new profile”
- Beneath the General tab, name your profile next to “Security Profile.” Do the same for the description.
- Note the Product ID, Client ID, and Client Secret that the site generates for you
- Click the Web Settings tab and the Edit button next to the profile dropdown
- Find where it says “Allowed Origins,” click “Add Another” and type https://localhost:3000
- Click “Add Another” next to where it says Allowed Return URLs and type https://localhost:3000/authresponse
- Proceed to the “Device Detail” tab, pick a category, write whatever description you want (it doesn’t matter), pick an expected timeline, and enter a 0 in the section asking how many devices use the software.
- Lastly, you may opt to add in Amazon Music. But since it doesn’t work on the PI, we’ll be leaving this blank
Step two: Clone and install Alexa
Notes: With the Amazon Developer Account profile created for your DIY Echo, the next step is to install Alexa on the Raspberry Pi itself.
- Plug in all the required cables and boot up your Pi; make sure the GUI is properly displaying
- Open the Terminal application and type “cd Desktop.” Press Enter
- Type “git clone https://github.com/alexa/alexa-avs-sample-app.git and once again, press enter.
- Type cd ~/Desktop/alexa-avs-sample-app” and press enter
- Type nano automated_install.sh to bring up the text editor
- At this point, we enter the Product ID, Client ID, and ClientSecret that were noted earlier.Navigate between text fields using the arrow keys. Press control + X to save and exit and return to the command line
- Now we run the install script by typing cd ~/Desktop/alexa-avs-sample-app and pressing enter.
- Input . automated_install.sh
- A prompt will pop up; press Y for the different questions until the configuration process begins.
- Walk away for about 10 minutes while PI installs some remaining software
Step three: Run the Alexa Web Services
Notes: So far, we’ve completed the preliminary setup. The three remaining steps are will have to be repeated each time the device is rebooted—in inconvenience, I know, but hey, you’ll have at least built your own DIY Echo. If possible, avoid turning off the device, otherwise keep some notes on hand to swiftly input the following codes.
- To start the Alexa Web Service companion service and open up a port to communicate with Amazon, type the following code:
cd ~/Desktop/alexa-avs-sample-app/samples - Next, type
cd companionService && npm - Leave this window open
Step four: Run the sample app and confirm your account
Notes: The next step involves running a Java app and launching the web browser that registers the Pi-powered Echo with the Alexa Web Service. By the end of sub-step 8, the Pi will have obtained the necessary tokens to communicate with Amazon’s server
- Click File > New Window to open up a second Terminal window.
- Type
cd ~/Desktop/alexa-avs-sample-app/samples - Type
cd javaclient && mvn exec:execand press enter - Next, a browser window will open up asking you to authenticate your device. Click Yes.
- Another window will immediately pop up, this time in the Java app. It will ask you to click “Okay,” but do not click it yet.
- Switch back to the browser and log into your Amazon Developer account
- Notice the authentication screen for your DIY Echo. Click “Okay” and the browser will display “device tokens ready.”
- Switch back to the original Java window outline in sub-step 5, and click “Okay.”
Step five: Start your Wake Word Engine
Notes: It’s time to breathe life into the DIY Echo by activating the Wake Word Engine, and empowering the PI to start listening once you say “Alexa.” Two software options fulfill this need — Sensory and KITT.AI. Both are initially, but Sensory expires after 90 days, so we’re going to go with KITT.
- Type cd ~/Desktop/alexa-avs-sample-app/samples and press enter
- Type cd wakeWordAgent/src && ./wakeWordAgent -e kitt_ai and press enter
And there you have it. A DIY Amazon Echo for $35. From here on in, shouting “Alexa” will kickstart software. Why don’t you go ahead and test it out? You’ll immediately know it works if you hear a beep.
But we’re not done yet.
Step six: Fine-tune the microphone, so you don’t have to shout
Notes: For those who prefer not having living in a household where everyone’s constantly shouting “ALEXA” all day, a minor adjustment can drastically improve how well the Alexa picks up the sound. Naturally, higher-quality microphones perform better, but nonetheless, swap back to the command line editor
- Type alsamixer and press Enter
- Press F6 on the keyboard to select a different USB device, and select your microphone
- Use the arrow keys to increase the capture volume, and tap ESC when satisfied
- Type sudo alsactl store to save your settings
That’s it. Now proceed to download automation scripts from If This Then That and become the boss of a state-of-the-art, Silicon Valley-esque, Internet-connected home.
Extra: Add AirPlay support
Notes: The one thing we didn’t touch upon just yet is Bluetooth support, the only difference between a commercial Echo and your DIY variant. Fortunately, a nifty little thing called AirPlay permits your DIY Echo to double as a music receiver capable of streaming music from your phone or computer. The process involves a few more lines of code.
- Open up the command line editor through Terminal
- Type sudo apt-get install git libao-dev libssl-dev libcrypt-openssl-rsa-perl libio-socket-inet6-perl libwww-perl avahi-utils libmodule-build-perl and press enter to install the necessary software
- Press Y when prompted and wait for everything to download and install.
- Type in git clone https://github.com/njh/perl-net-sdp.git and press Enter. This is required for the newest version of AirPlay’s software. The next few commands build and install this software.
- Type cd perl-net-sdp and press Enter.
- Type perl Build.PL and press Enter.
- Type sudo ./Build and press Enter.
- Type sudo ./Build test and press Enter.
- Type sudo ./Build install and press Enter.
- Type CD .. and press Enter.
- Grab shairport, the DIY Airport software. Type git clone https://github.com/hendrikw82/shairport.git and press Enter.
- Type cd shairport and press Enter.
- Type Make and press Enter.
- Type./shairport.pl -a AlexaPi and press Enter.
Source: Lifehacker via Github
Advertisement
Learn more about Electronic Products Magazine


