For U.S. coffee shops, business usually cools down as weather heats up. In an effort to slow the seasonal decline in coffee sales, many coffee companies like Starbucks have turned to selling cold brew, coffee made by steeping coffee grounds in room temperature or cold water for an extended period, roughly 18 to 24 hours. Unlike traditional coffee brewed with hot water, the leached coffee beans produce a different chemical profile and flavor, resulting in lower acidity and lower caffeine content. Also unlike traditional coffee, cold brew boasts a 20% higher price tag compared to traditional iced coffee.
Conventional methods of concocting cold brew include small commercial drip towers, which produce small amounts of coffee per 18-hour batch, or larger, expensive towers aimed at coffee shops. Building a large brewing tower from scratch using a microcontroller-driven solenoid valve produces the same great quality cold brew in much larger batches for less money than traditional towers, and is more economical in the long run than store-bought.
The complete instructions are available on Makezine, but we’ll summarize the main parts to help you decide if it’s worth your time. The project essentially consists of four parts: building the tower, the drip-rate controller, mounting and assembling the unit, before culminating in the brewing operation itself.

Part 1: Tower
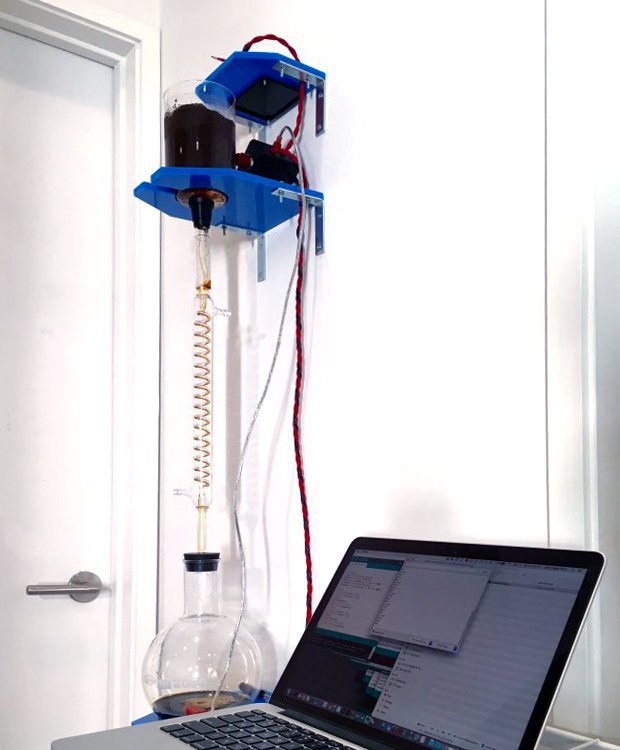
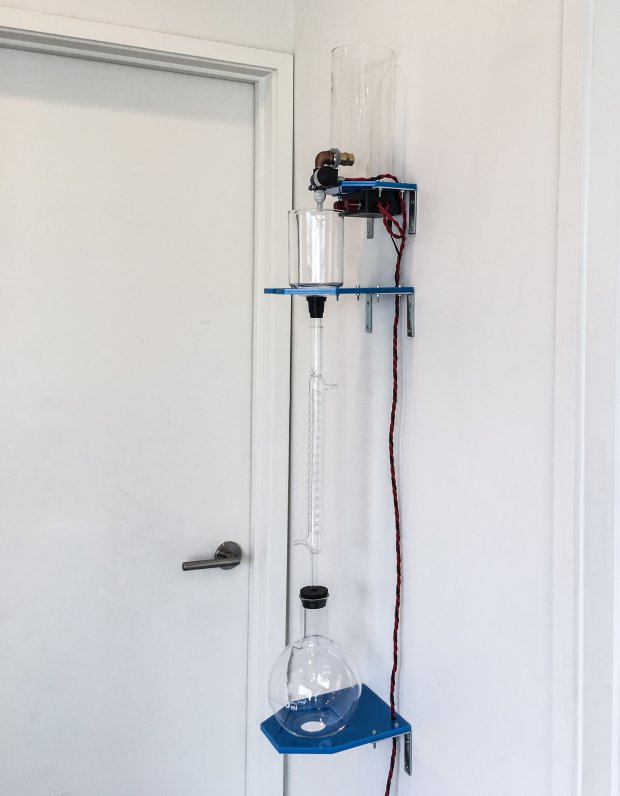
A cold-brew coffee tower consists of three main segments: a water receptacle at the top with a drip control valve, a chamber for grounds in the middle where the brewing takes place, and a carafe to receive the brewed coffee at the bottom.
For this part you will need:
- Glass beverage dispenser, 2 liter, with removable spigot
- Elbow fitting and nut for your dispenser-to-solenoid valve connection
- Teflon pipe tape
- Beverage solenoid valve, NSF-Certified, 12V DC, normally closed
- Push-to-connect fitting, plastic, with 3/8” NPT male thread and ¼” press-fit connections, such as a John Guest fitting
- Food-safe tubing, ¼” diameter, a short length
- Tabletop glass siphon beaker
- Cloth filter and screen assembly
- Boiling flask, flat bottom, 2 liter
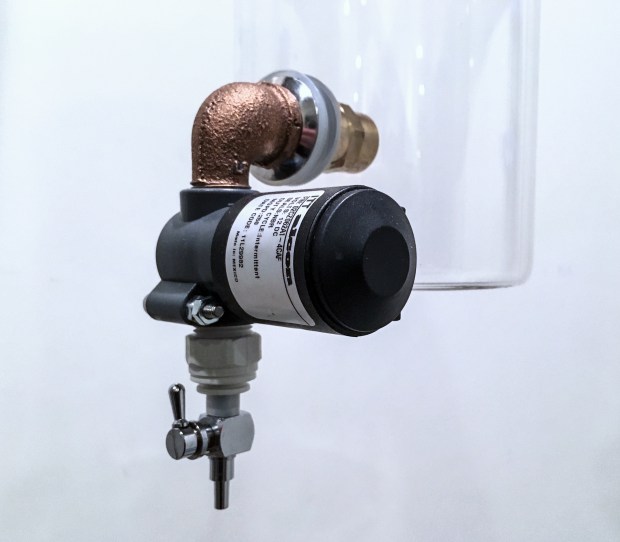
The first step is to prep the beverage dispenser by removing the existing spigot to make room for the new solenoid valve and stopcock valve which will help control the drip rate of the brewer.
Begin by wrapping the replacement elbow’s threads with Teflon tape and insert it into the dispenser, using any washers and gaskets necessary to create a water-tight seal. Thread on the nut and tighten, and then crew on the solenoid valve.
Screw in the John Guest push-to-connect fitting into the solenoid valve and insert a small length of ¼” tubing, which reduces the size of the drip tube’s inner diameter. Finally, fit the stopcock valve in place.
Part 2: Dip-rate controller
Drip rate is everything when it comes to cold brew. With each batch averaging between 18 and 24 hours, there is no need to rush the process. Using a microcontroller-driven solenoid valve, you are able to control the drip rate of the brew and ensure a long steeping process.
For this part you will need:
- Arduino Uno microcontroller board
- Prototyping shield for Arduino
- Enclosure, about 4”x3”x1.6”
- Power supplied, regulated, 12V DC 1 A (2), one for Arduino, one for solenoid
- Potentiometers, 1KΩ, with knobs
- Transistor, N-channel FET, TO220 package
- Diode, 1N4001 type
- Resistor, 10kΩ
- Screw terminals (2) for power wiring
- Wire, stranded
- Spade terminal crimp connectors, ¼” (2) and crimper
- Double-stick foam tape for controller mounting
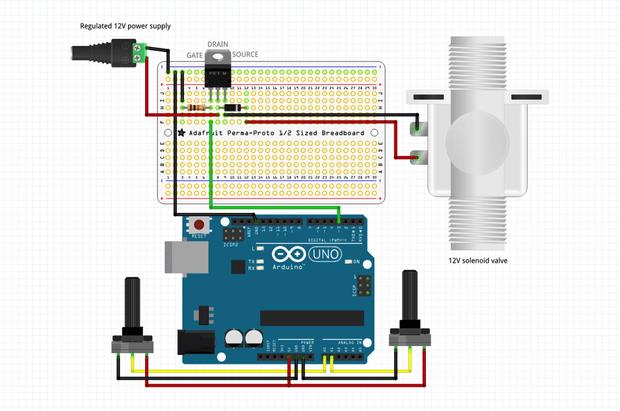
Follow the circuit diagram to solder the transistor, diode, resistor, potentiometers, and power supply to the proto shield, and use crew terminals to connect the power supply and solenoid valve wires to the board. Plug the power supply into the wall AC power, and connect the spade terminals to the solenoid valve.
Plug the proto shield into the Arduino Uno, and upload the project code file to the Arduino using a USB. Once uploaded, disconnect the USB and plug in the second power supply into the Arduino’s power jack. The solenoid valves will begin to open and close.
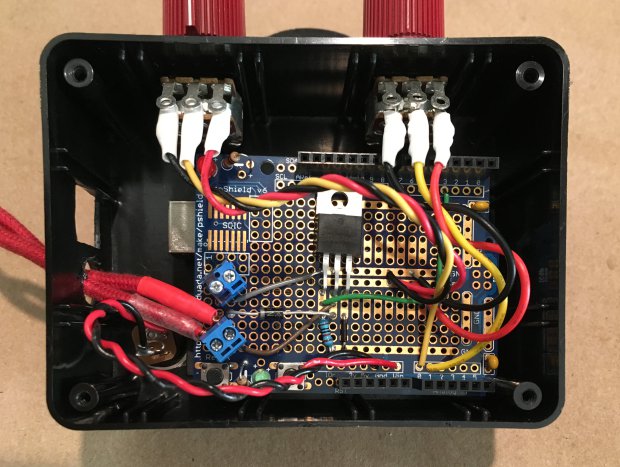
With everything working, place the Arduino Uno and proto shield into the enclosure, leaving two holes in the enclosure for the potentiometer’s control knobs, power sources, and solenoid wiring.
Part 3: Mounting and Assembly
The tower can be mounted to either a wall or board.
For this part you will need:
- Acrylic sheet, 1/8” thick, 24”x24”
- Machine screws, M4, 18mm long with nits (12)
- Brackets and screws for mounting
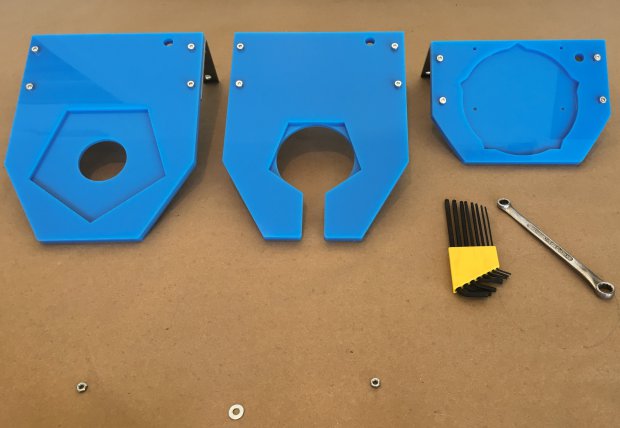
Begin by cutting the files for the acrylic mounts, and attaching the mounts with the M4 screws and nuts.
Since the distances between components will vary, mount the lowest shelf first, then place you boiling flask, stopper, and grounds beaker on the shelf in order to determine the ideal placement for the middle shelf. Mark the holes, and then mount the middle shelf. Use the same technique to measure, mark, and mount the stop shelf.
Run the wiring up through the holes in the shelf, then screw and plug the wires into the controller. After wiring the mount, affix the controller to underside of the top shelf using double stick foam tape.
Insert the filter screen into the bottom of the grounds beaker, and then place all of the glass components on their respective shelves. Plug in the solenoid valve.
Part 4: Brewing Operation
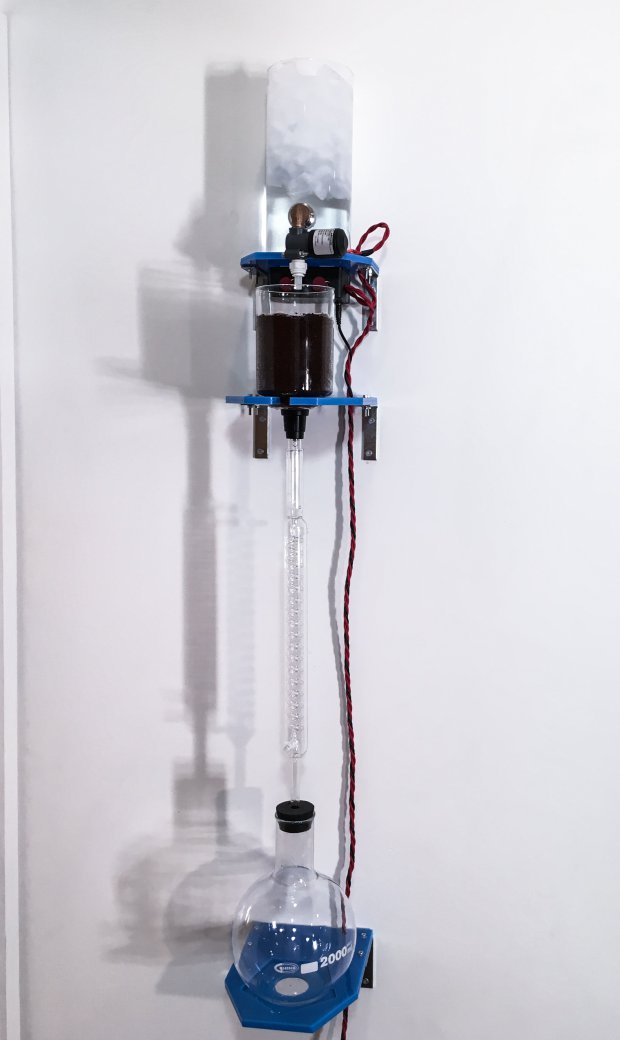
First pour coarse coffee grounds into the middle beaker, and moisten evenly with water. Cover the grounds with the cloth filter. Fill the water receptacle with cold water.
Plug in the power supplies and then use the knobs on the controller to adjust the drip rate and amount into the flask below. Depending on the coarseness of the grind and the rate of the drip, you’ll have to wait up to 18 hours for the brew to finish. When it’s done, pour some on ice and enjoy your delicious, high tech, cold brew coffee.
Sources: Makezine
Advertisement
Learn more about Electronic Products Digital


