Want to build an electric motor? It’s likely you could find most of the items needed around your house in order to build a simple one. Below is everything you’d need and instructions on how to make it.
Begin with magnet wire
Well, this first item on the list is something you might have to buy. Because magnet wire has an enamel coating, you can wrap it in a coil and the sides of one wire won’t create a conducting short path to the next wire. Instead, the current will travel in a loop.
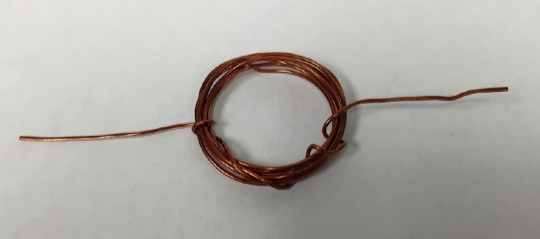
First you’ll need to wrap the magnet wire around a circular object to make a coil. A D-cell battery can work well for this. Then, be sure the ends of the wire stick out of the circle, as pictured below.

If you’re wondering why you should make a circular loop, it’s because an electric current makes a magnetic field. You can increase the strength of this magnetic field by increasing the current or making multiple loops. And since the finished project will be a simple electric motor, the more loops, the better. Five to 10 loops is recommended.
Switching the current
The loop will function as the main spinning part of the electric motor. But to get this spinning with a single magnet, you should change the direction of the electric current. However, in this design, you can turn the current on and off instead of changing direction. You can do this by simply shaving off part of the enamel insulation on the wire with a sharp object, such as the edge of a pair of scissors or a utility blade.
Know that when the loop rests on a metal conductor, current will flow through it. When the loop rolls over and is upside-down, it will sit atop the enamel and there will no longer be current.
Placing it on a holder
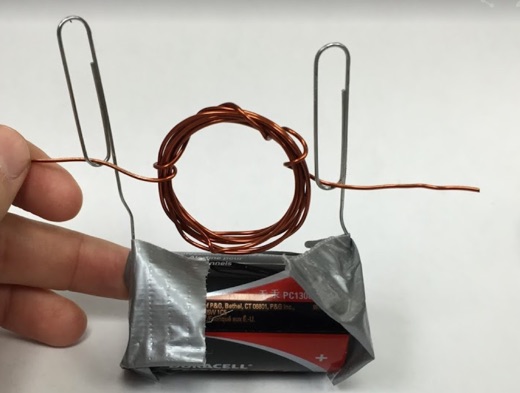
Because this loop must spin, you’ll need to be sure it’s supported. You can use two paper clips to form a bracket for the arms of the loop. If you’re using paperclips, be sure they’re not plastic-coated, as the plastic will act as an insulator. Be sure to use ordinary paperclips, and bend one end of each paperclip so that it sticks out straight, then tape the two paperclips to a D-cell battery.

At this point, you’re ready to start assembling your parts. Slide the loop of wire through the paperclips so the paperclips steadily support it. It’s okay if you need to bend the wire somewhat, as long as it’s not too unbalanced (it may flip to one side). When the bare copper wire makes contact with the paperclip, there will be an electric current in the loop along with a magnetic field, so you’ll just need another magnet to interact with the loop. Just about any magnet should work.
Final steps
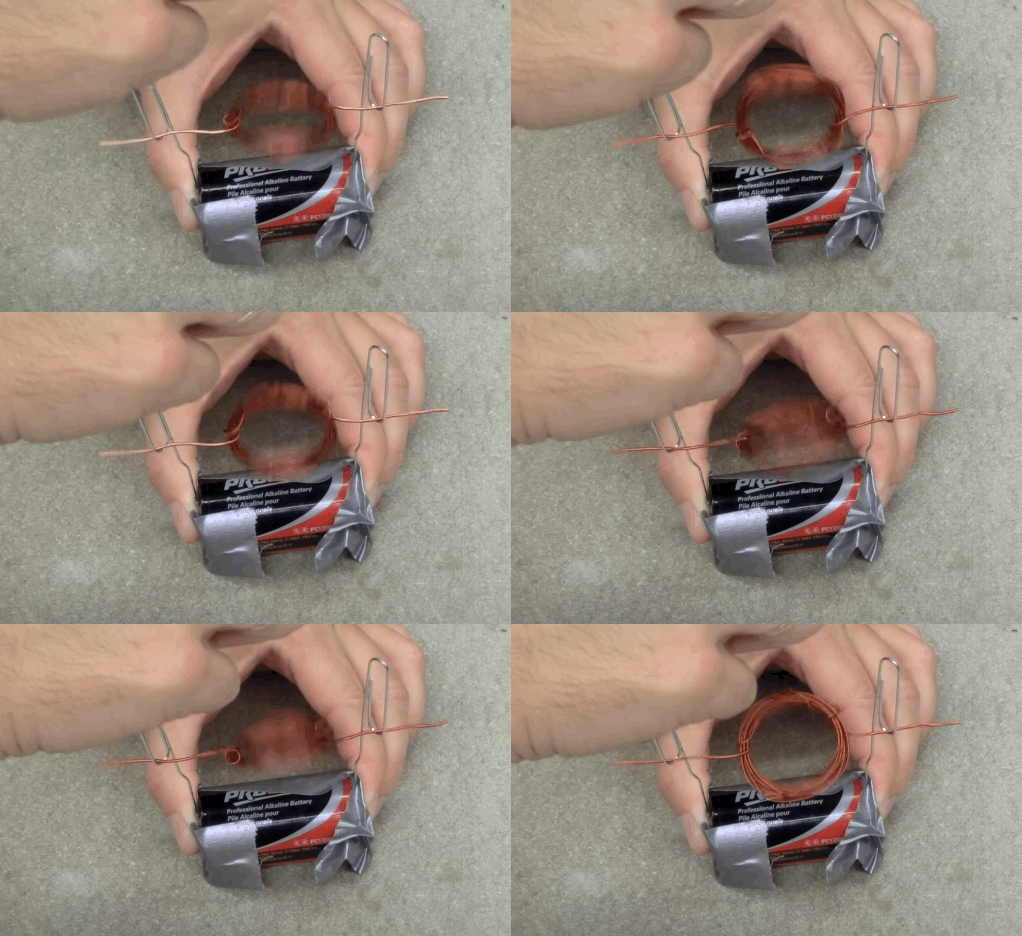
To give the loop a slight spin, hold the magnet above it. If all is working correctly, the loop should continue to spin. If not, flip the magnet around and rebalance the arms on the loop.
Below is a successful finished project.

Source: Wired
Advertisement
Learn more about Electronic Products Magazine


