The complete instructions are available on Instructables , but we’ll summarize the meaty parts to help you decide if it’s worth your time. First and foremost, braveoechnovember1 points out that undertaking the project requires you to get your hands slightly dirty, as there is a bit of “surgery” involved, but rest assured, the end results are reversible.
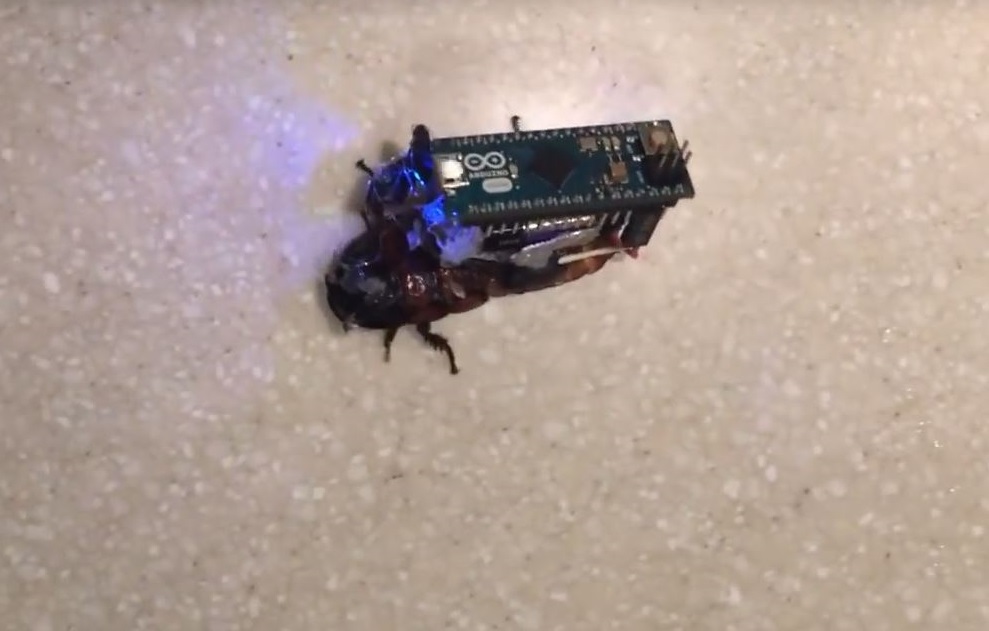
What we’re essentially doing is stimulating a live-roach’s antenna using variable frequencies transmitted from an Arduino. By transmitting an artificial signal, we are able to make the roach believe there’s a wall in front of it, allowing us to trick the animal into turning in a desired direction. Very straight forward—the process will continue to work until the insect is eventually desensitized to the electric input.
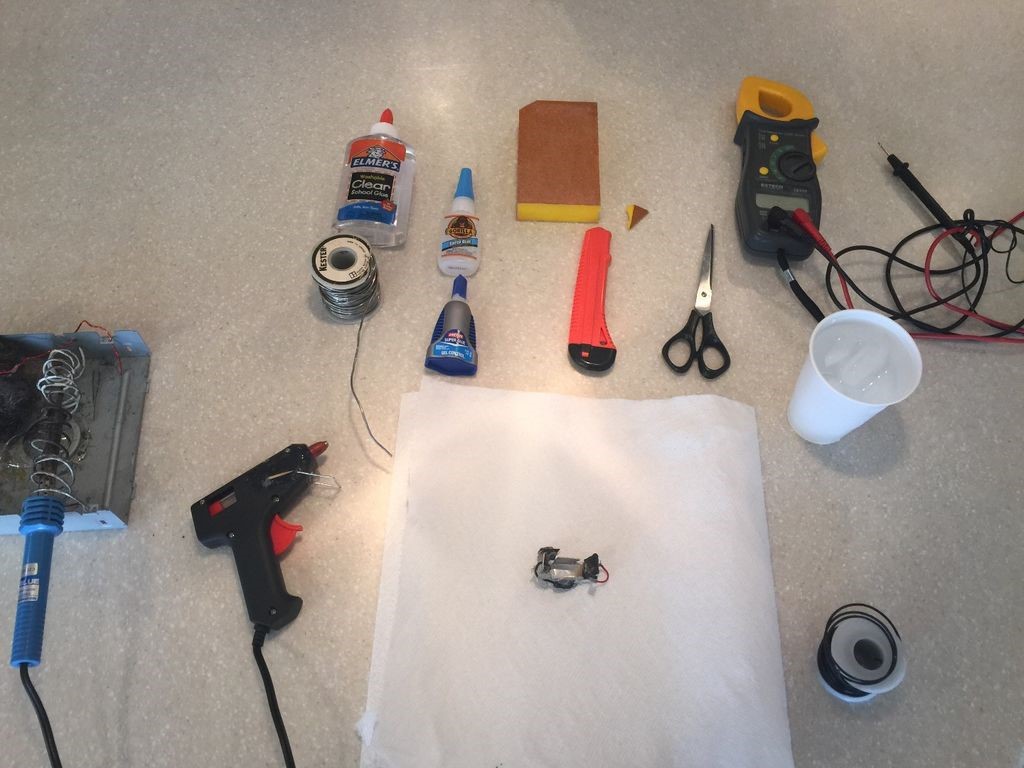
The project requires following material:
-
- Arduino Micro $20
- 12V A23 battery $2
- A23 battery holder (or some aluminum to make your own)
- Pin connector
- Thin wire (I got mine out of some stranded wire) $1
- Super glue(cyanoacrylate) $2.48
- Your choice of non-toxic glue 90 cents
- Sandpaper
- Small washer
- Large fish tank
- Small fish tank
- Bananas, apples, or dog food (cockroach food)
- Egg cartons (used as hiding spots for the cockroaches)
- Cut up paper (to be used as bedding inside the terrarium)
- Heat pad
- Madagascar Hissing Cockroaches (Verify whether your country or state’s regulations on transporting cockroaches).
You will also need a soldering iron, straight pin, hot glue gin, scissors, a box cutter, and a lighter/matches.
Step 1: Create a terrarium
Place sheets of paper on the bottom of the fish tank to create the terrarium’s bedding. Next, scatter some egg cartons to create a friendly haven for your roaches. Feed them as required.
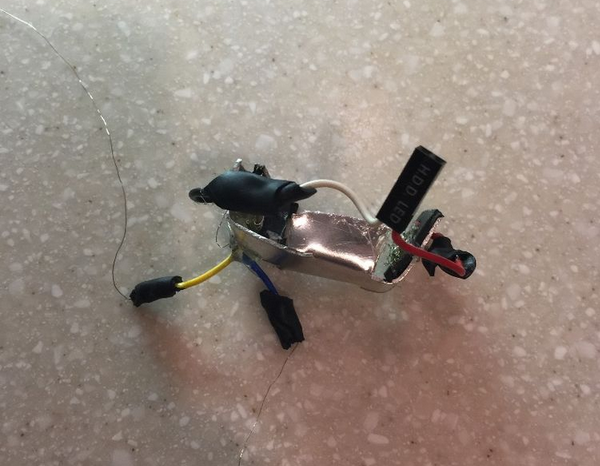
Step 2: Assemble the “backpack”
The first step is to assemble the enclosure that houses the Arduino and attaches to the roach. Begin by cutting a sheet of aluminum into a cross measuring two by three inches. Next, bend the edges upward to create a rectangular box and wrap electrical tape around one of the edges. Afterward, drill a small hole on one of the ends, insert wire through it, and solder the back end to a small washer. Repeat for the other side. When finished, solder a pin connector to the wires and place electrical tape on the solder joints.
Now it’s time to hot glue a larger pin connector to one side of the “backpack” and solder about an inch of stripped wire from the stranded wire to each of the pins.
Step 3: Test the connectors
Insert an A23 battery into the finished holder and place the pin connector into the Arduino Micro’s VIN and GND pins. If the Arduino’s LED lights up, then you’ve correctly build the enclosure.
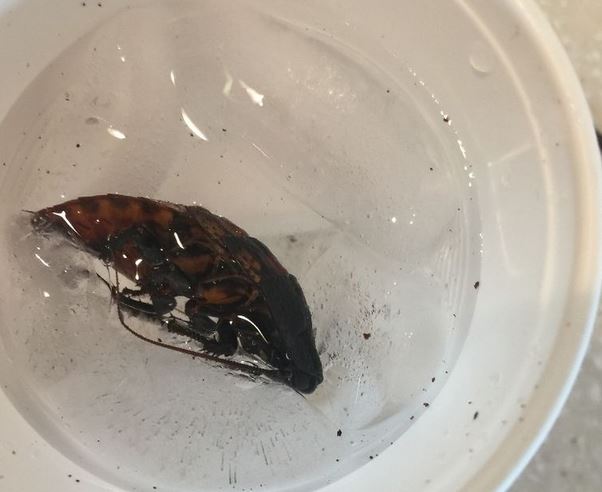
Step 4: Soak the roach in ice water
This is the part that’ll make most people uncomfortable, as it requires snipping the insect’s antenna and sanding it’s thorax. Fortunately, the insect feels no pain—its thorax is made from chitin, a nerveless substance similar to fingernails—and it’ll regrows its antenna.
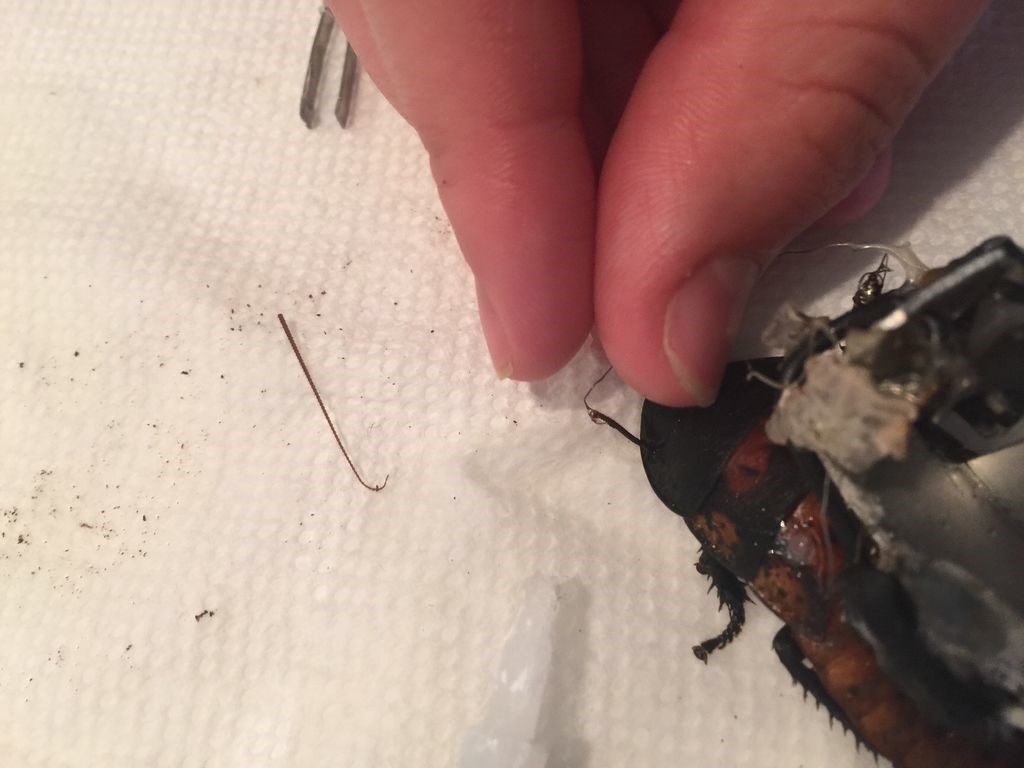
Step 5: Antenna surgery
Begin by soaking the insect for two minutes in ice water to anesthetize it. Once you’ve remove it from the water, place it on a paper towel and sand the surface of the thorax, removing a very small amount of chitin to make the surface suitable for gluing. Next, glue the backpack to the thorax using nontoxic glue.
The ensuing step involves the actual “surgery,” so prepare to trim the antenna down to three centimeter. Next, delicately insert the two lose backpack wires about a quarter of a centimeter into the hollow of each antenna. Apply non-toxic superglue.
Step 6: Thorax surgery
If you’ve gotten this far, don’t get squeamish just yet; carefully puncture the side of the insect’s thorax (away from the legs) with a straight pin before inserting the ground wire a quarter of a centimeter into hole; ensure you’ve added a small amount of superglue to the ground before proceeding. Place the roach in the terrarium and let it recover overnight.
Step 7: Code
Upload the code below onto the Arduino Micro or modify your own code. Bear in mind that Arduino uses milliseconds. Also, if you wish to stimulate the right antenna replace 11 with 12 in the string below.
/* void setup() {
void loop() {
tone(11,random(1,100),random(1,1000)); //this will make the cockroach turn in one direction
noTone(11)
}
Step 8: Test it out
Remove the roach from the terrarium and insert the A23 battery into the backpack. As soon as you place the pin connectors into the Arduino the roach will begin to turn left or right, depending on your code. If nothing happens, then you may have incorrectly grounded the wires.
Conclusion: Care for the roach
There you have it! A cockroach controlled with electric current. After you’ve been sufficiently wowed, remove the backpack (gently) and snip the wires. Do not release your pet roach into the wild, but care for them.
Advertisement
Learn more about Electronic Products Magazine


