Not to romanticize all the yesteryears and how great things used to be, but the proliferation of mobile technology that children are exposed to means summertime fun today is vastly different than how it used to be. Sure, there are still Wiffle ball games, but they’re more likely to be organized by group text than knocking on a door. And a get-together with friends didn’t actually happen unless everyone is tagged at a specific location, numerous photos are taken, and social posts / updates get uploaded throughout the evening.

Yes, the advent of mobile devices has brought on a different experience to the summer months, but parents can use the technology to educate their children during this time out of the classroom. Take, for instance, this relatively simple DIY project in which a smartphone can be used as a digital microscope. All it takes is about $10 of supplies, and 20 minutes of one’s time. When finished, the child (and curious parent) can begin exploring the outdoors in a whole new way.
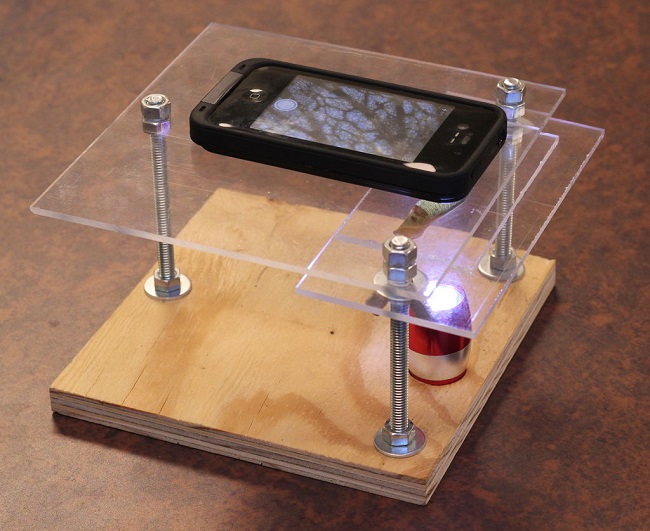
Interested in creating the smartphone digital microscope yourself? Here are the materials you’ll need:
Three 4 ½” x 5/16” carriage bolts
Nine 5/16” nuts
Three 5/16” wing nuts
Five 5/16” washers
¾” x 7” x 7” plywood — this will be used for the base
⅛” x 7” x 7” plexiglass — this will be used for the camera stage
⅛” x 3” x 7” plexiglass — this will be used for the specimen stage
Scrap plexi (~ 2″x 4″) — this will be used for the specimen slide (optional but useful)
Laser pointer focus lens (use two for increased magnification)
LED click light (only necessary for viewing backlit specimens)
As far as the tools, gather up a drill, bits, level, and ruler.
Begin with the laser pointer. It has a lens on it which you need to remove – do this by unscrewing the front cone and the back cover of the tube. Take out the batteries and with the eraser end of a pencil, push the rest of the pointer’s internal components out the front of the tube. The front of the assembly – which is the side without the spring to contact the batteries – is where the focus lens is located. Unscrew the tiny black piece of plastic in front of the lens to free it.
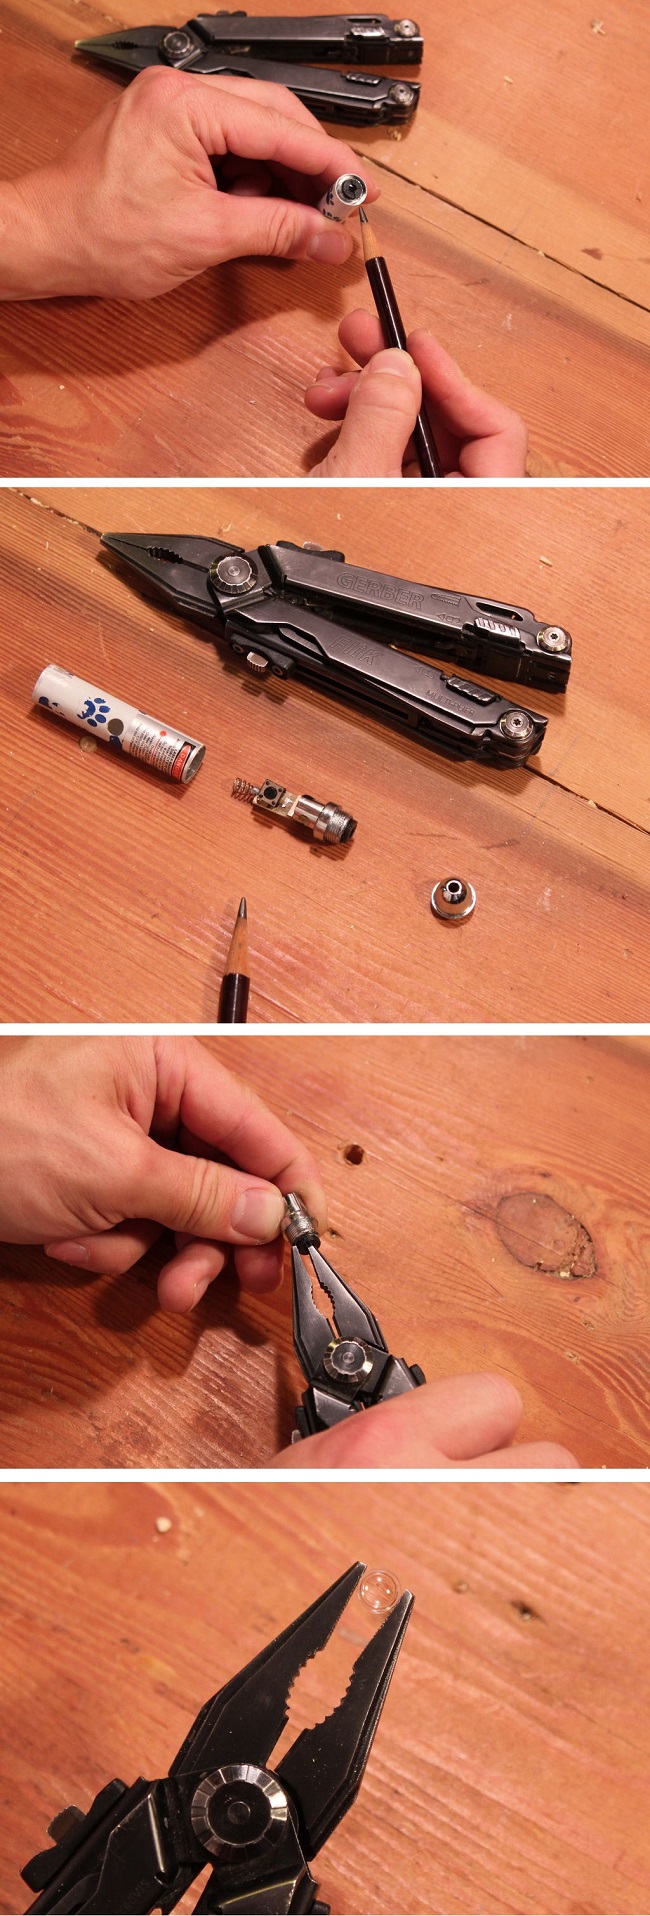
Before moving on to the next step, it is worth pointing out two things: (1) Obviously, you don’t need to purchase an expensive laser pointer in order to get this specific component. A simple $1 pointer from the dollar store should suffice. (2) The lens itself is not symmetrical — in fact, there’s a thin translucent strip on one side of the lens. When the microscope is set up, this side mustn’t be adjacent to the camera. To determine this, stick the lens between the prongs of a hairpin and tape this rigged up contraption to the back of the smartphone. If in the proper orientation, your phone’s camera will have a larger field of view.

Now, onto drilling — using a marker / Sharpie pen, make a mark on the front two corners of the plywood base at about three quarters of an inch off both sides and front edges. When complete, place the 7”x7” plexiglass atop the wood, then the 3”x7” plexiglass atop that; per the latter item, it should extend roughly ¾” off the front of the base. Now that everything is lined up, drill through the entire assembly.
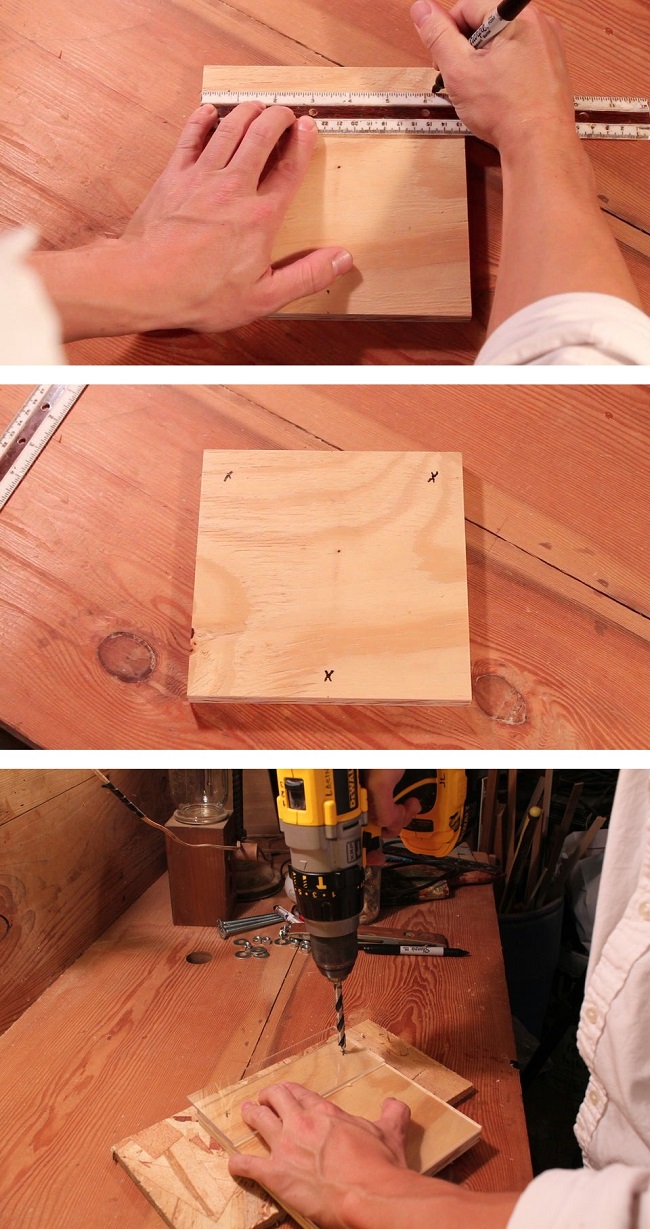
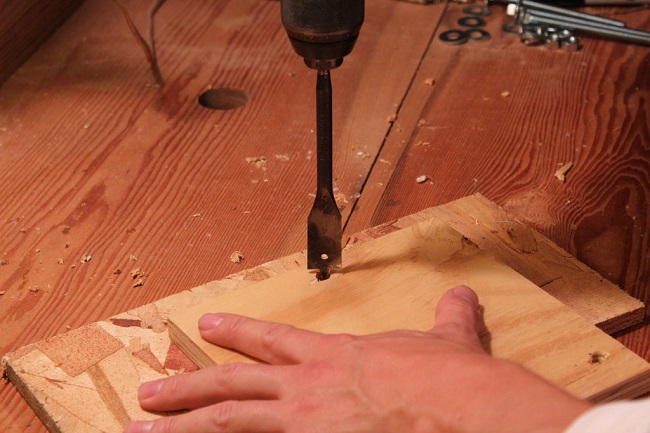
The carriage bolts that stick up through the microscope assembly need to be countersunk so the stand can sit flat; to achieve this, flip the base over and countersink the holes with a spade bit.
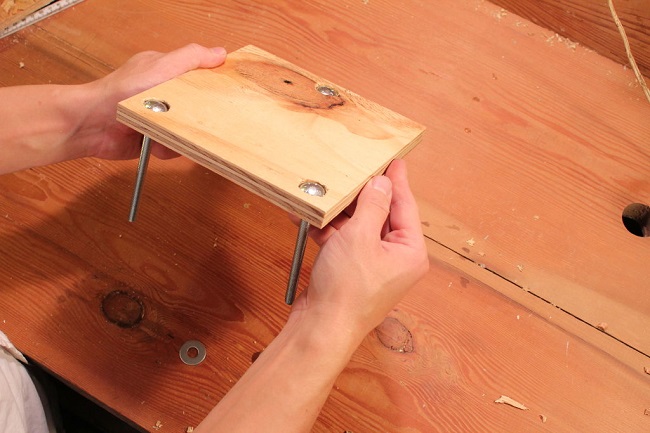
As far as the laser pointer lens, find a drill bit that is slightly smaller than the lens itself; remember, you can always shave a little more plexiglass away after the fact. You never want to start out with something that might be too big, as it will result in the entire piece of plexiglass turning to scrap.
¾” off the front of the 7”x7” plexiglass, and in line with where the bolts hare positioned, drill a hole for the lens. If it’s too small for the lens, use a file or some sandpaper to make it bigger. Do it slow and test repeatedly to avoid making the hole too large.
A good rule of thumb for setting up the lens is that in order for it to be effective, it needs to be as close to the phone as possible. If your phone isn’t in a case when using it as a digital microscope, make the lens flush with the plexiglass. On the other hand, if you will be leaving it in a case, leave the top of the lens slightly exposed so that it rests closer to the camera.
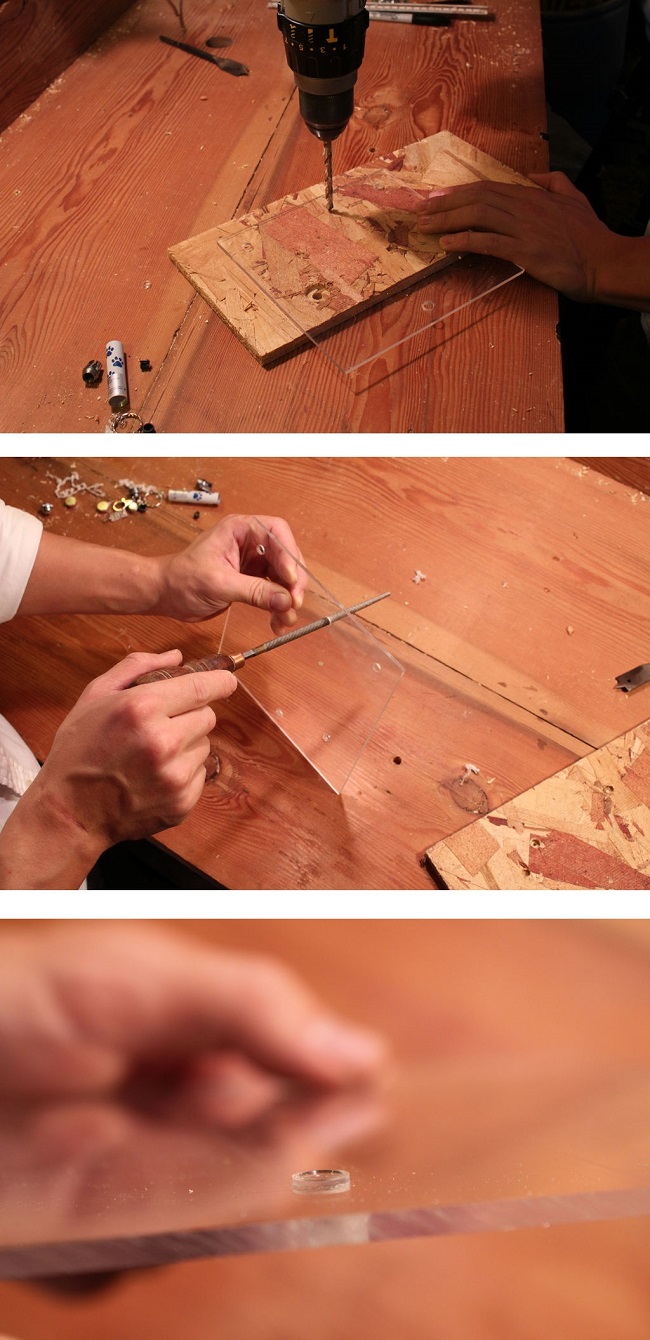
Now for the light source — drill a hole for it directly below where the lens sits. The best way to mark it is to slide the 7”x7” glass down the base, mark where it needs to be drilled, and proceed with drilling a shallow hole to rest the light in.
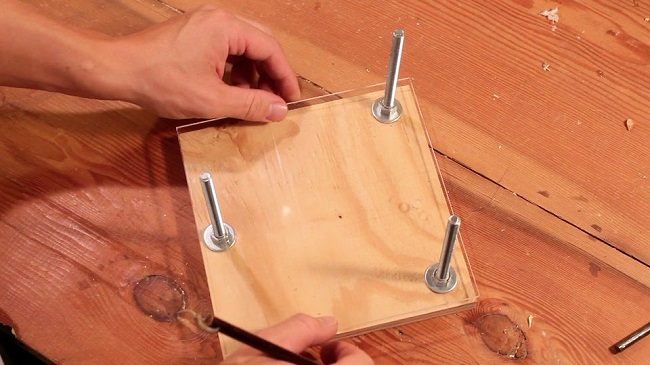
900 words and we’re just about there – it’s time to put it all together. Start with the washers and nuts, which are used to hold the bolts tight to the base. Add some upside down wing nuts, followed by washers to the two front bolts. Place the 3”x7” plexiglass on top of the washers and add a nut to each bolt. Lower everything about ½” and rest the 7”x7” plexiglass on top of the nuts. Use a level to make sure everything rests evenly – when satisfied with the level, tighten down the final nuts.
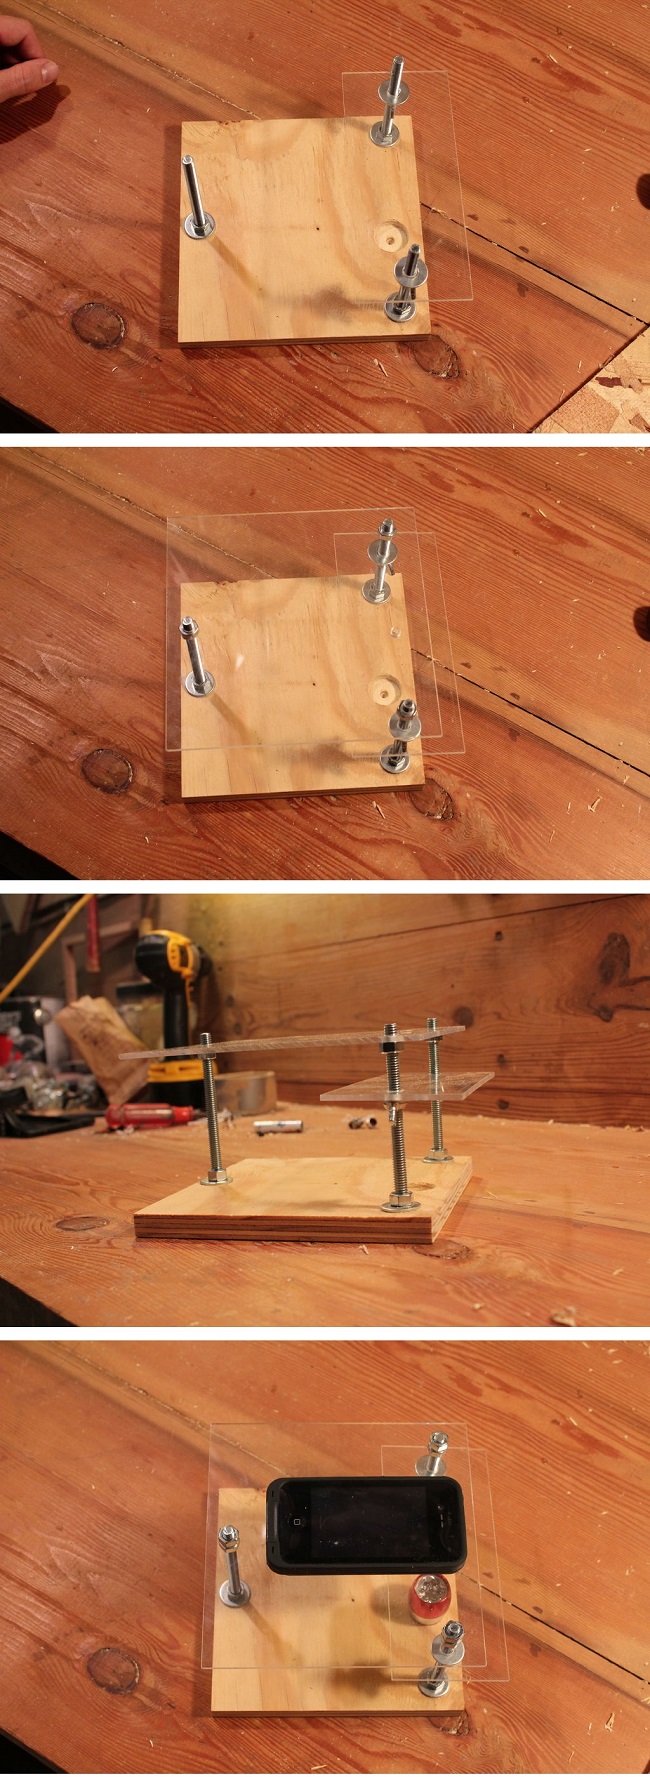
And that’s it – with your smartphone and about $10 worth of supplies, you’ve put together a fully functional digital microscope in twenty minutes. Now it’s time to start gathering items to study under the phone.
To explore this project in greater depth, and to see a video demonstration of the construction process, check out the clip below that explains how to turn your smartphone into a digital microscope:
Instructions, images, and video all via YoshikovInstructables
Advertisement
Learn more about Electronic Products Magazine


