You’ve done your homework and selected a great low-power MCU. The sleep current is incredibly low, the run current is great, but somehow you are not meeting the application lifetime needs of your battery-powered design. You need to take current savings to the next level.
Selecting a low-power MCU has never been easier. Many vendors now offer MCUs that focus on low power. They include an arsenal of new low-power modes, ready to wage war on your power problems. However, once you have selected your MCU, you are presented with an open array of choices for implementation. You need to know the impact of peripherals on power consumption: Can I leave an A/D converter on all the time and sample continuously, or must I implement a sampling methodology?Should I shut down the CPU core while sending data out the UART? Should I implement a wait loop with a While instruction, or some other type of software structure? Without visibility into these types of tradeoffs, it will be hard to answer these questions and even harder to improve your battery life.
To get to the next level, MCU selection is no longer sufficient; you must understand the impact of your software on current consumption.
Help getting there
Current-analysis tools are beginning to come out that can guide you to the next level. The plain old ammeter does did not provide all real-time information needed. Instead, it gives an average current. A current-analysis tool’s advantage is tying current consumption directly back to software, and capturing a historical current consumption “snapshot” as the code is executed. Now, you have a link between consumption and execution.
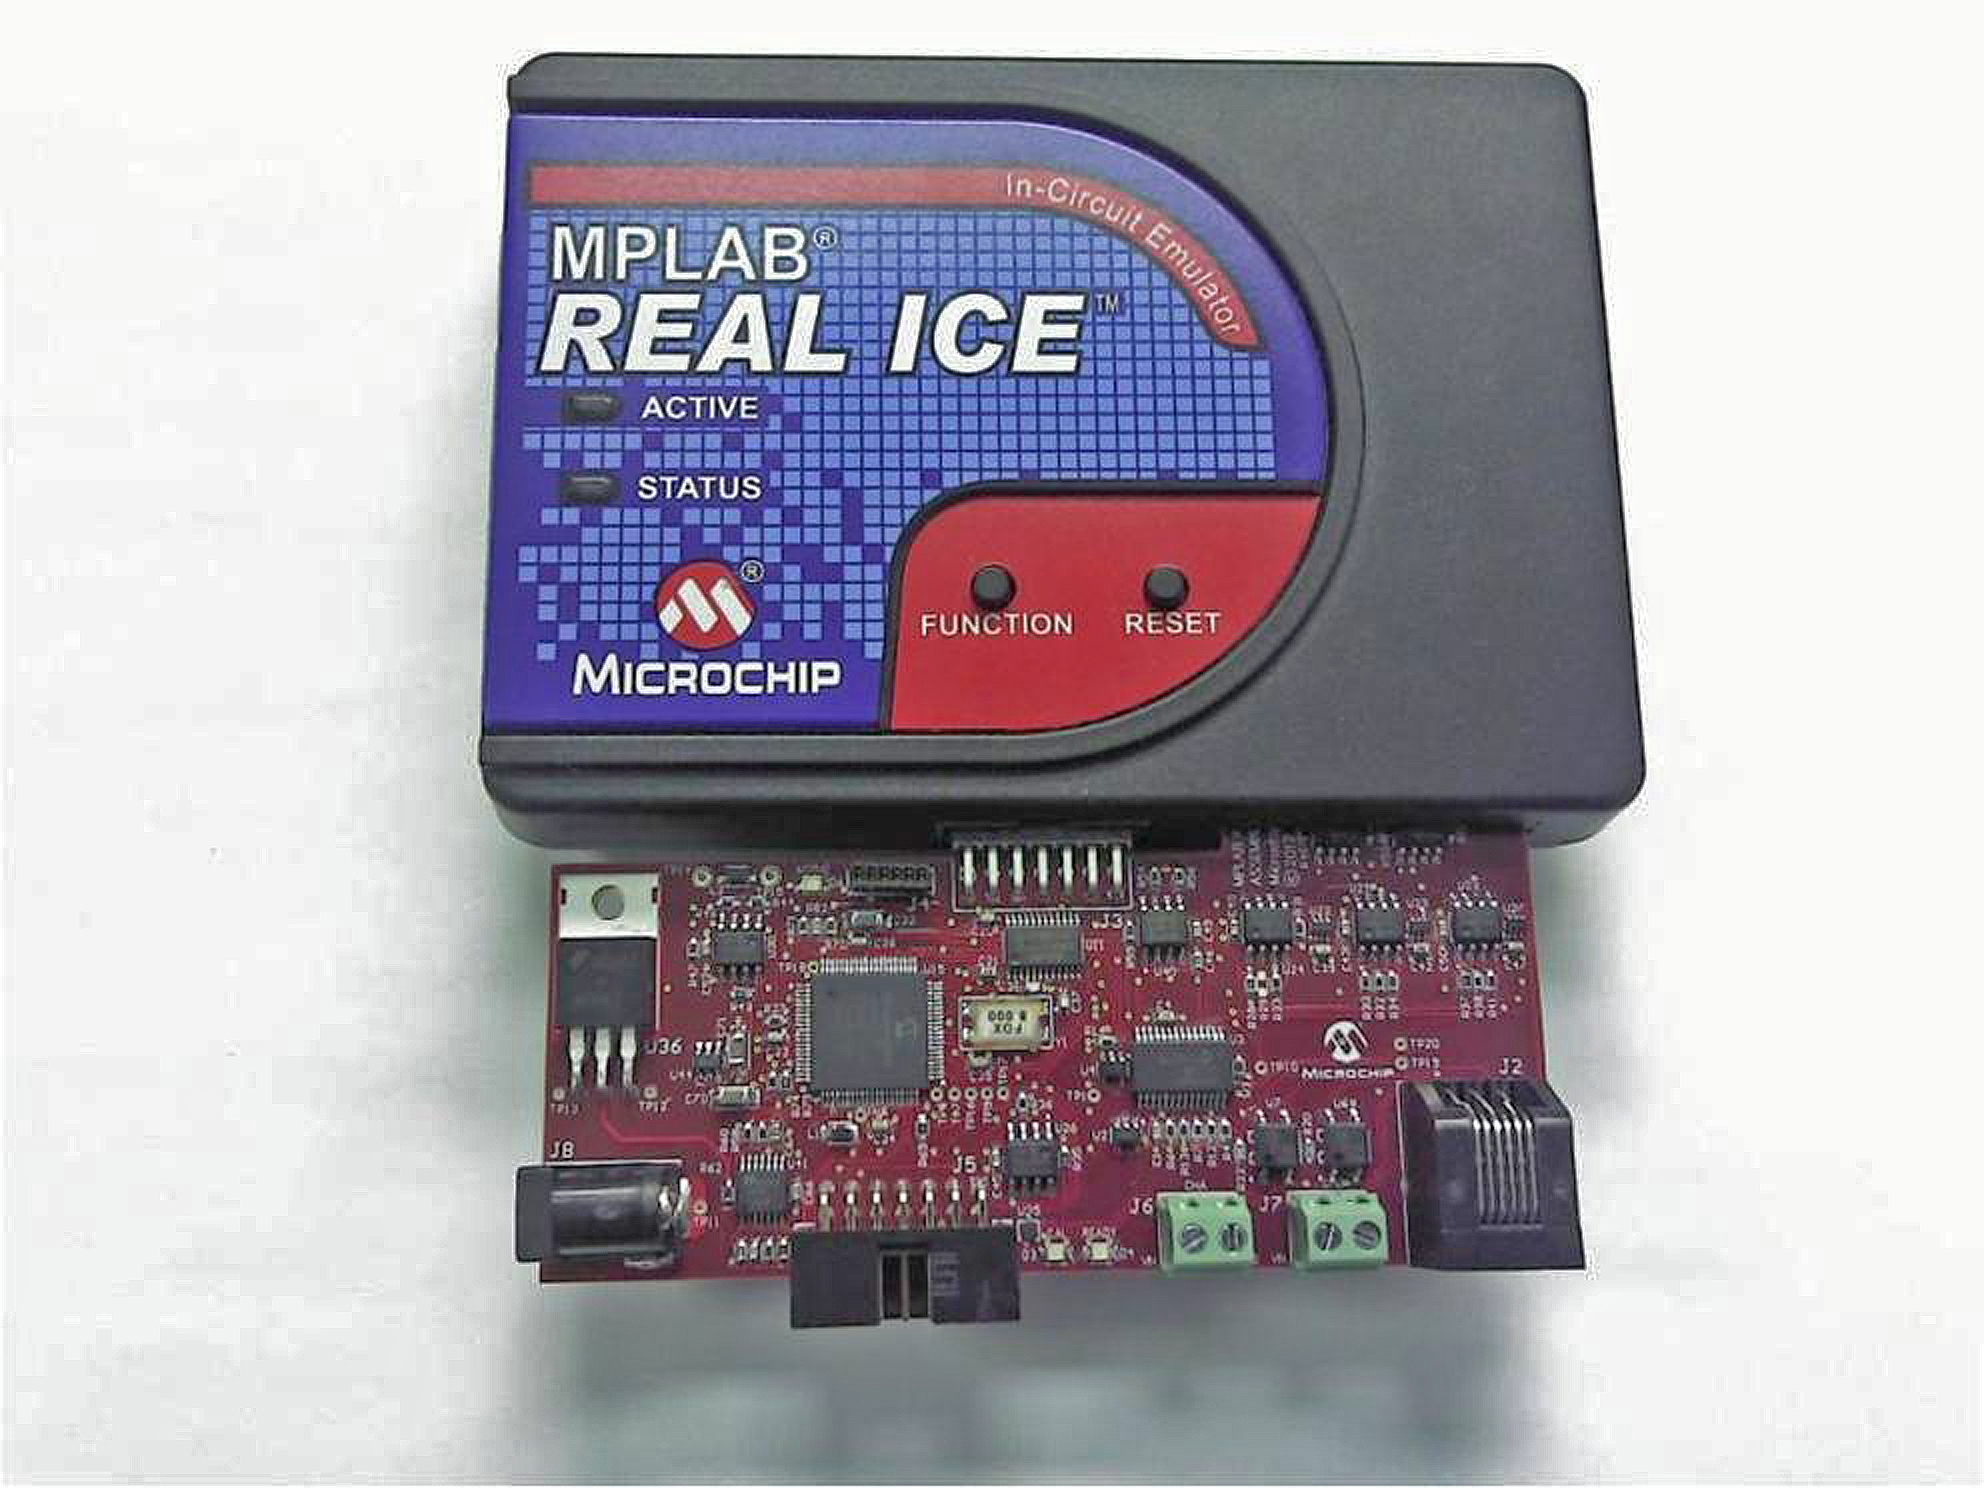
One example of a number of such tools that you can find now is the MPLAB REAL ICE Power Monitor from Microchip, which is used in conjunction with the MPLAB REAL ICE in-circuit emulator (see Fig. 1).

Fig. 1:Microchip Technology’s MPLAB REAL ICE emulator with Power Monitor attached.
Power Monitor is a single-board solution that is integrated into the MPLAB X IDE, and features a measurement range of of 200 nA to 1 A. The tool is fast, with a sampling rate is 1 MHz, so short current bursts can be detected. The Power Monitor also features current threshold break points, allowing you to quickly identify high current consuming code.
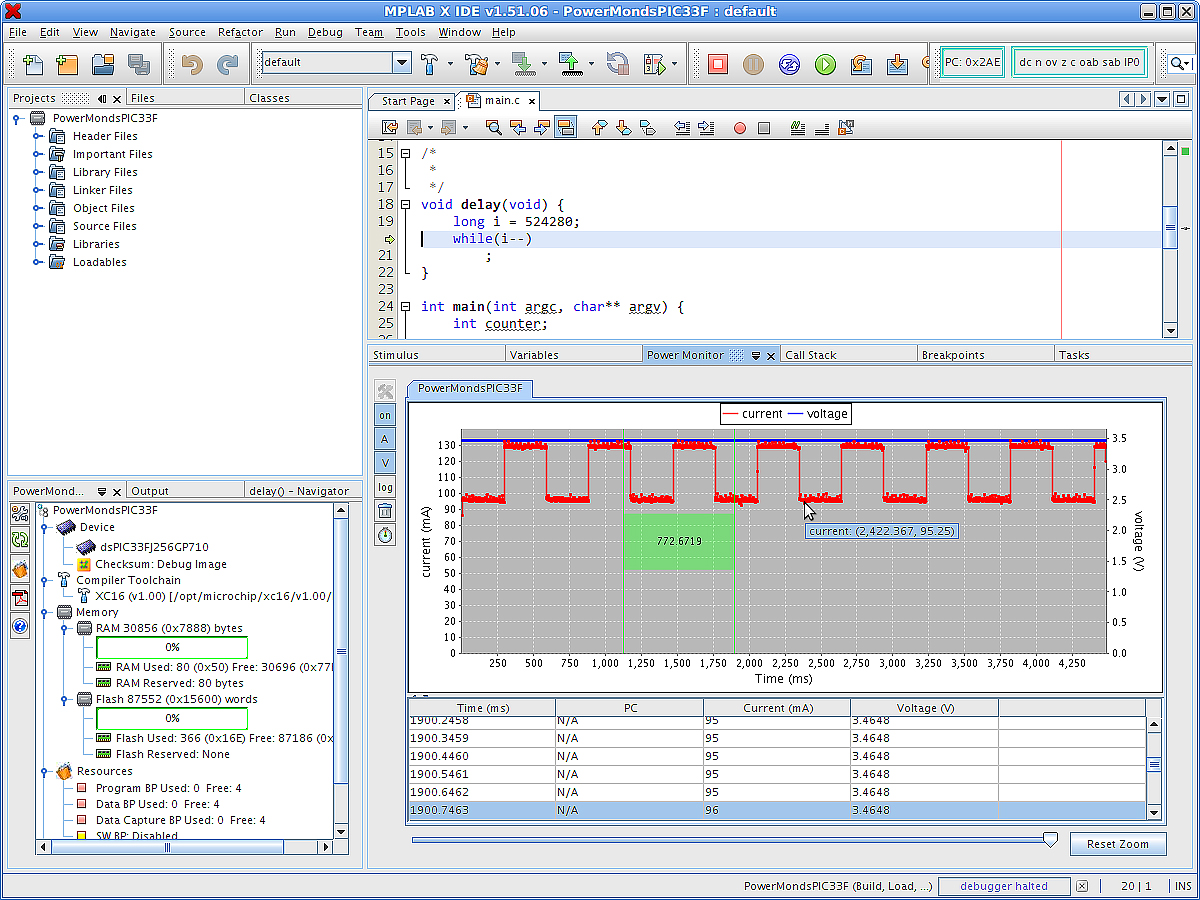
The current and voltage are displayed within the IDE window as shown in Fig. 2.

Fig. 2: MPLAB X IDE with its integrated power monitor graph
In low-power applications, there is a lot of time spent waiting for something to happen. The applications remain in sleep for long periods of time, then awake and execute the code. In sleep, there is often a timer that must expire to awaken the MCU. In Run, we often wait in a simple While (1) loop until an A/D or UART finishes its operation.
Current-measurement probes can be used to evaluate ways for improving upon the current consumed, by allowing us to shed light on inefficient software.
This was very evident when Microchip was characterizing run current on one of our newer MCUs called the PIC24FJ128GA310. This MCU had internal flash improvements that should have reduced run current by nearly half. But, at first, the design team did not see the expected improvements.
The code was very simple and looked like this:
int main(void)
{
//Set ports to outputs
void config_ports(void)
//Gate off all peripherals eliminating switching current
void PMD_on(void)
Nop();
//Endless loop to measure Run current
while(1)
{
}
}
This setup resulted in a Power Analyzer reading of 230 µA running at 1 MHz, which did not match with the expected result. The team realized that this type of software implementation did not take advantage of the MCU’s architectural improvements. Their next code looked like this:
int main(void)
{
//Set ports to outputs
void config_ports(void)
//Gate off all peripherals eliminating switching current
void PMD_on(void)
//Nop();
//Endless loop to measure Run current
while(1)
{
}
}
By simply commenting out the Nop (), this aligned the memory fetch to the flash size and the measured power was cut to 150 µA — a reduction of 35%.
Next, the team added repeat () instructions followed by Nop () instructions to the loop, resulting in further reductions to the run current—achieving 95 µA. A 58% reduction, all dependent upon software coding style, as measured by the Power Monitor.
Advertisement


