Looking to explore the solar system this summer? With the PiKon telescope, you can do just that. Based on 3D printing and Raspberry Pi, the DIY astro-camera can easily be constructed at home.
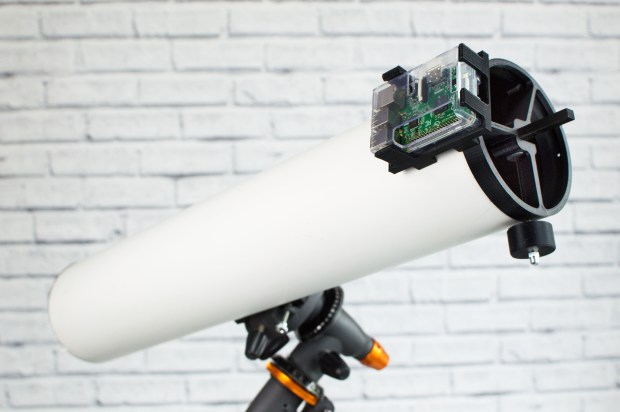
The PiKon telescope. Image source: Make.
Created for Sheffield University’s Festival of the Mind in 2014, the device's makers wanted to show how the two technologies could put a homemade reflector telescope within the reach of anyone. After much success, the team began offering everything from 3D files to a complete kit with 3D-printed components and optics to fellow hobbyists. They also offer fully-built PiKon telescopes for those who would just like to create Raspberry Pi programs for astronomy purposes.
How the PiKon telescope works
The PiKon telescope is based on the Newtonian reflecting telescope, which is a 350-year-old design using a concave mirror (objective) to form an image, and is examined using an eyepiece. The objective mirror is mounted in a tube and a secondary mirror is placed in the optical path at a 45° angle, allowing the image to be viewed from the side of the tube.
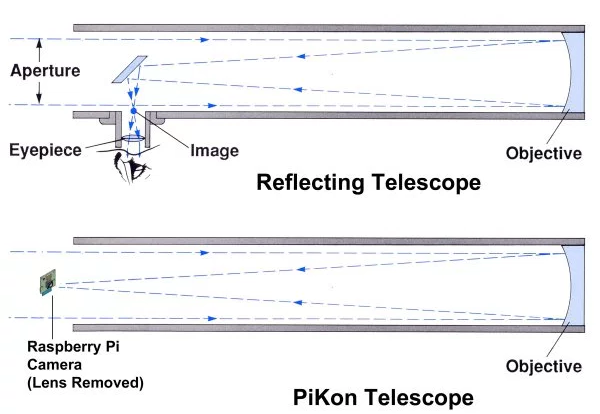
The PiKon telescope is based on the Newtonian reflection telescope. Image source: Make.
With the PiKon telescope, the image formed by the objective is focused onto a digital camera sensor. At 25 mm x 25 mm, the Pi camera board is mounted directly in the optical path at prime focus. The amount of light lost by doing this is similar to the losses caused by mounting the 45° mirror in a conventional Newtonian design.
DIY
The PiKon telescope consists of two main assemblies based on 3D-printed parts. At the bottom of the scope, the mirror assembly holds a standard 4.5-in diameter spherical mirror.
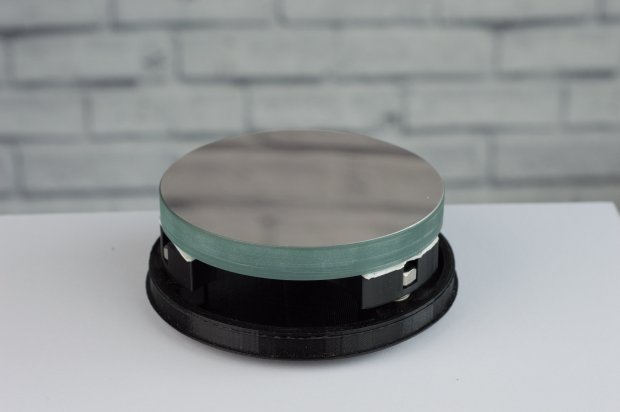
The bottom of the PiKon telescope. Image source: Make.
As for the top of the scope, the spider assembly supports the Pi camera and allows you to move it back and forth along the telescope axis to focus the image, using a rack and pinion setup. To expose the camera sensor, you simply unscrew the lens on the Pi camera.
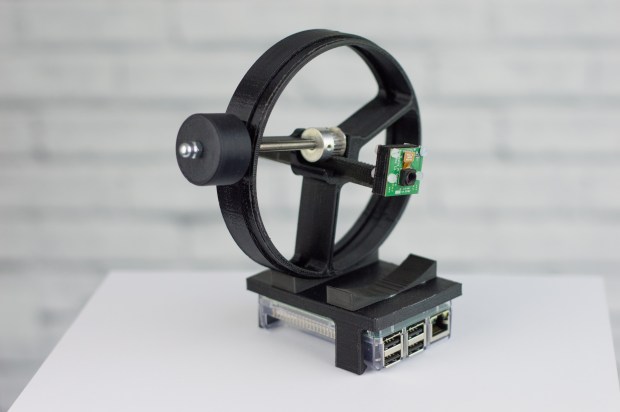
The top of the PiKon telescope. Image source: Make.
Next, the two assemblies are mounted into a telescope tube made of 6-inch plastic pipe. In the U.K. where the PiKon telescope was originally created, the team used ventilation duct. In The U.S., the 3D parts were fit to standard PVC pipe.
To pull it all together, the team 3D-printed an astronomical dovetail wedge mount that’s fitted with a standard ¼-20 thread, making it easy to mount the telescope on either astro or photo tripods. Images snapped by the Pi camera can be viewed on a monitor plugged into the Raspberry Pi, then transferred to PC or Mac from the Pi’s microSD card, or uploaded from the Pi to Dropbox using an Internet connection.
Mirrors and magnification
Equipped with a magnification factor of about 120X and a field view of about ¼ degree, the moon subtends ½ degree at your eyeball while peering through the telescope. This means the PiKon can see about half the moon at a time.
You can use spherical or parabolic mirrors, which include different focal lengths. You’d just have to simply cut the telescope to length accordingly. In order to determine the focal length of a third-party mirror, image a distant object onto a piece of paper and measure the distance between the mirror and paper. The PiKon is designed with a long travel on the focusing rack, making it forgiving of small inaccuracies in measurement.
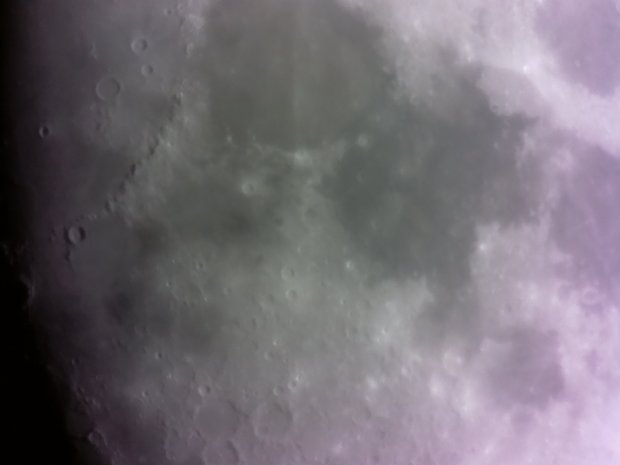
Photo of the moon shot by maker Brett Porter's PiKon telescope. Image source: Make, Brett Porter.
Customization
One maker, Brett Porter wanted to make his telescope portable for field trips, so he created his own touchscreen controller with a 2.8-inch TFT display, four programmable buttons, and a 5,200 mAh lithium-ion battery that also powers the Pi and camera.
If you’d rather control the telescope wirelessly, why not use a tablet? According to maker Scott Miller, he used his iPad to control the PiKon via an ad-hoc network and the RPI-Cam-Web-Interface app instead of a hardwire connection to a PC. With the app, you can easily shoot videos and snap images, and a built-in preview/download feature is included.
To buy everything you need for your telescope, visit pikon.online.
Source: Make
Advertisement
Learn more about Electronic Products Magazine


