By Gary Elinoff, contributing writer
Arduino boards are a relatively simple platform that take a lot of the work out of developing microcontroller-based projects. But, the key phrase here is “relatively simple,” because while you don’t need to be a microcontroller engineering specialist to build some really neat projects, Arduino is not for the complete beginner. Let’s look at the basic skills and competencies you’ll need in order to get started with Arduino.
Hardware perils
It’s a much-maligned art, and paradoxically, while design engineers in large companies can sometimes delegate this skill to others, as an Arduino hobbyist or entrepreneur, you often can’t — you have to become good at soldering. Fortunately, there are many good videos that can help you, such as the one from electronhacks below.
Polarity
This will seem so simple as to appear silly to professionals, but we’re talking to beginners here, so you advanced people, stop chuckling! First and foremost, you must be very careful when you hook your power supply to the Arduino board. The positive voltage goes to Vin and the negative goes to GND.
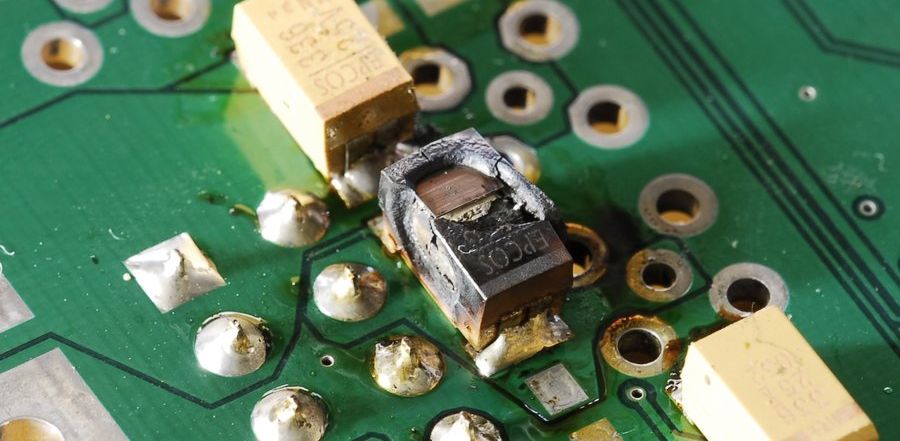
Image source: Graphicsbuzz.com.
The above illustration should serve as a cautionary tale to the beginner. Be very careful to source your Arduino’s power source correctly, as a mistake in polarity will fry your board.
Breadboards
Breadboards make it easy put together projects or prototypes with a minimum of soldering. The outer rails (two on each side) are electrically connected up and down, while inner rails are shorted left to right. In the illustration below, the negative battery terminal is connected to the resistor, and the other end of the resistor goes to the LED. The LED’s other lead goes to the wire, which goes to the battery’s positive terminal.
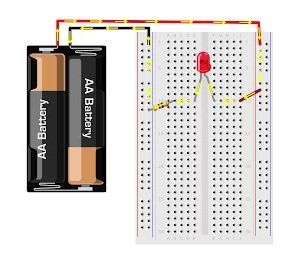
Image source: MakeUseOf.
Don’t overtax the Arduino
The Arduino board is a microcontroller, much like the CPU in your smartphone. It is not designed to power much of anything by itself. To do so, you need to employ some kind of buffer device, like a MOSFET, to change the tiny amount of current coming out of the Arduino to the much greater amounts needed to power things like motors. And this isn’t only a rookie mistake, because often, even people who should know better try to power things that, while less demanding than motors, are still on the hairy edge of what an Arduino can safely drive.
The software
We’ve saved the best for last, because the real beauty of the Arduino system is that so much of the software is already written for you and is available in libraries. You may need to do substantial programming to get a project up and running. But a lot of what you do is put the pre-written pieces together, much like assembling an IKEA bookshelf.
The Arduino Integrated Development Environment (IDE)
The first step is to access the IDE. It’s with this package that you will do the programming that will tell your board what to do. Arduino makes it easy for you: you can work with the IDE online or download it directly to your PC from their site. As a beginner, the safest thing to do is to agree to all the default options offered, so you can’t go wrong.
Once you have the IDE up and running on your PC, hook the Arduino board to your PC via a USB cable. There will be a few steps to make sure all is as it should be.
The best thing about these pre-written programs is that they will also provide instruction on how to connect the various inputs and outputs on the board to the components on the breadboard, so that the lights will flash, the motors will turn, and you will be absolutely delighted and amazed.
Advertisement
Learn more about Electronic Products Magazine


