By T.K. Hareendran, contributing editor
This week, I got my first Wio Link. It looks like a groovy little board that I have been eager to try out. The claim is that, just by installing an App on any Android/iOS mobile phone, one can build simple IoT projects within minutes without hardware programming, breadboarding, jumper wire loops, or solder smoke.
Seeed Studio describes its Wio Link as an ESP8266 SoC-based open-source Wi-Fi development board that allows users to create IoT applications by virtualizing plug-and-play modules to RESTful APIs with mobile apps. The company originally launched Wio Link on KickStarter at the end of 2015, when they raised more than eight times their original target. They now offer the board from stock for $14, along with a number of starter kits containing both the board and various plug-and-play Grove modules for adding functionality to the board.

The board’s salient features include:
- Visual configuration
- Plug-and-play Grove connectors
- RESTful APIs
- IFTTT application
- Android and iOS apps
- Over-The-Air (OTA) firmware updates
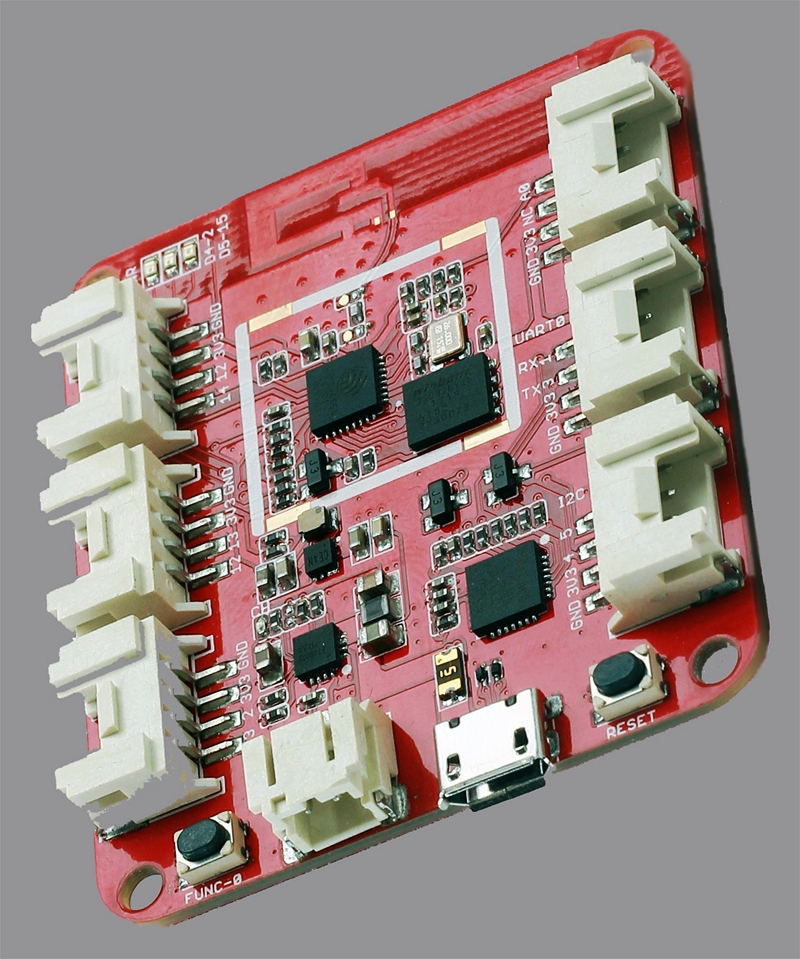
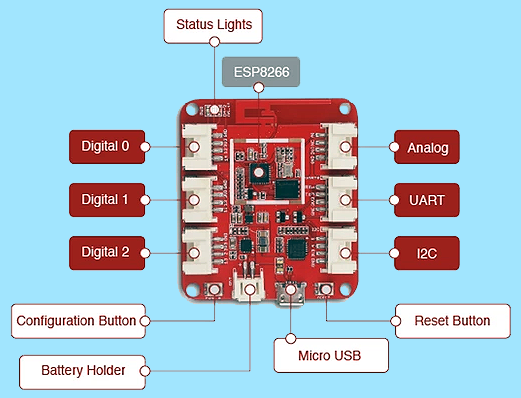
There are three principal chips on the Wio Link board: the ESP8266EX Wi-Fi SoC, the SiLabs CP2102 USB to TTL converter, and the Winbond 25Q23BVIG 4-MB serial flash memory. There’s also a micro-USB port for power/debugging and a socket for battery power in addition to Configure and Reset buttons. A half-dozen Grove connectors provide easy device connectivity for expanding the board’s resources.
Why Wio Link?
You may recall that I did a write-up on the Digistump Oak Wi-Fi development board, which is Arduino-compatible. The situation is rather different with the somewhat older Wio Link. A glance reveals that Wio Link is, in fact, an ecosystem rather than a simple platform. The board comes with plentiful four-pin universal connectors for Seeed’s renowned Grove System expansion modules, making it a breeze to link up physical devices to the web to create fascinating IoT applications. Everything is easily obtained and just plugs in, with software configuration that is drag-and-drop. This ease of development is a major reason why I was so frantic to try this thing — it seemed simply irresistible!
Setting up
Getting the Seeed’s Wio Link up and running is not very hard because their documentation has quite a bit of steering information. Connect to power, hold down the configure button until the onboard LED starts “breathing,” connect through the Wio Link app, configure the wireless network settings, and get started developing. Once you’ve connected, you can attach sensors as desired. There’s already a broad list of Seeed sensors fitted with the compatible four-pin connector, so you’ll probably find what you’re looking for.

Out of the box, you can use Seeed’s IFTTT (If This Then That) channel to try out some basic applications and use IFTTT’s own Maker channel to connect your Wio Link to, literally, anything. You can also get at the cloud-based REST API that the board’s firmware caters to directly from your pet programming language, such as Python.
Hands on
For a quick hands on, I hooked up and tested my board with the Android app, following some of the instructions on the “Getting Started” Guide. The main focus was to have a clear perception of the system and ramp up some experience for future, more innovative projects.

Here are the steps I took. First, I downloaded the Android app (Wio v2.3.6), and created a new account with my Gmail. Next, I powered up the board with USB power supply (5 V/2 A), which resulted in the red indicator burning steadily and the green indicator (in the middle) slowly blinking. After pressing the “Config” button for around four seconds, the blue indicator woke up. Finally, I selected Wio (WioLink_8B2AF2) and access point (AP) using the Android app to connect the board to the internet and named the board as “tknwio” to complete the initial setup.
I had only one expansion module to work with: The Grove LED module. I linked it to the board’s “Generic Digital Output” and updated the board’s firmware using the app. This created new firmware and pushed onto the device. The first update took around 90 seconds, but it’s pretty straightforward. Thereafter, I noticed that the device also has an API link, which invokes a webpage with all of the options to query, control, and reset the attached accessories.

Thus, I had successfully executed my first hands-on with Wio Link. What’s next to try is the interaction with IFTTT, but at the time, I did not want to mess up what I had done so far. Maybe some other time.
Conclusion
It’s all very well and good having compact boards like the Digistump Oak that can be used to build IoT projects. What’s promising about Wio Link, though, is that it’s not bound by the need for soldering to building a single project. It’s a flexible maker hardware platform ready for free-form experimentation and for designers to start using as the front-end of a project to frame “connected” sensors wherever you want. It is an affordable and easy-to-use open-source system and there are just so many upsides to working with an open-source system; I can’t see any downsides right now!
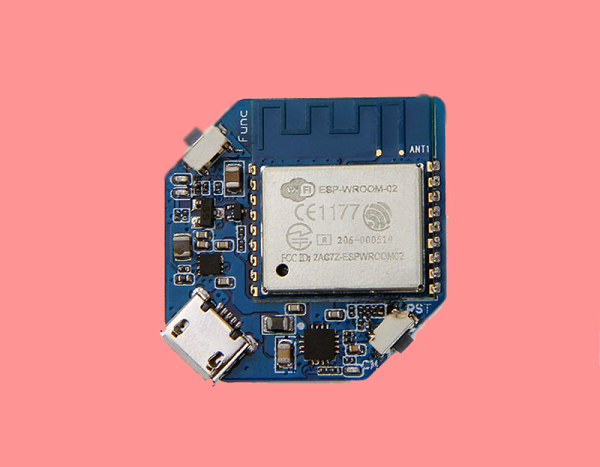
Quick Update: Seeed now offers Wio Node — the little brother of Wio Link. Wio Node is smaller than Wio Link and an even lower-cost (

Want more? Here are some of TK’s other hands-on reviews:
Hands-on review: Sparky single-board computer for media, VoIP, and standalone computing
Hands-on review: jailbreaking a timer to create an MCU development platform
Advertisement


