By T.K. Hareendran, contributing writer
When planning an IoT project, most developers look for some magic brick that can speed up the initial design stage so that they can quickly get on with prototyping or actual building. Wi-Fi is a frequent choice for the project’s wireless technology due to its wide availability and because it can provide the required throughput and power profile at the right price point for a wide range of applications in the IoT space. As a result, umpteen choices for compact Wi-Fi modules have cropped up, and the capable yet low-cost ( Digistumpis one that can truly be a boon for experimenters and makers.
Oak is an Arduino-compatible development board with built-in Wi-Fi backed by the Particle Cloud(formerly Spark.io) platform, which makes it easy to create cloud- connected electronic projects, devices, and products. The Oak board came out of a Kickstarter campaign that attracted more than 4,300 supporters ($182,038 pledged toward a $25,000 goal) in 2015. The original Kickstarter campaign planned to use Oak with RootCloud, a completely free, feature-rich REST API-based cloud platform and IDE. Since then, however, support has moved to Particle (to use their cloud), although all inherent features of Oak remained intact.

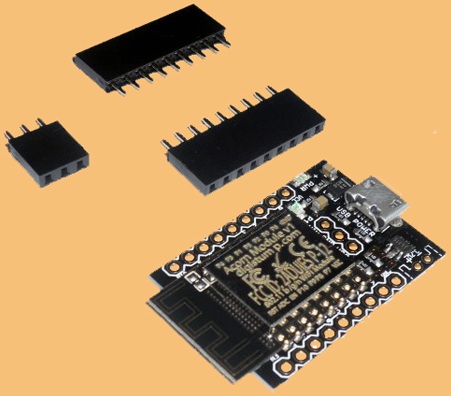
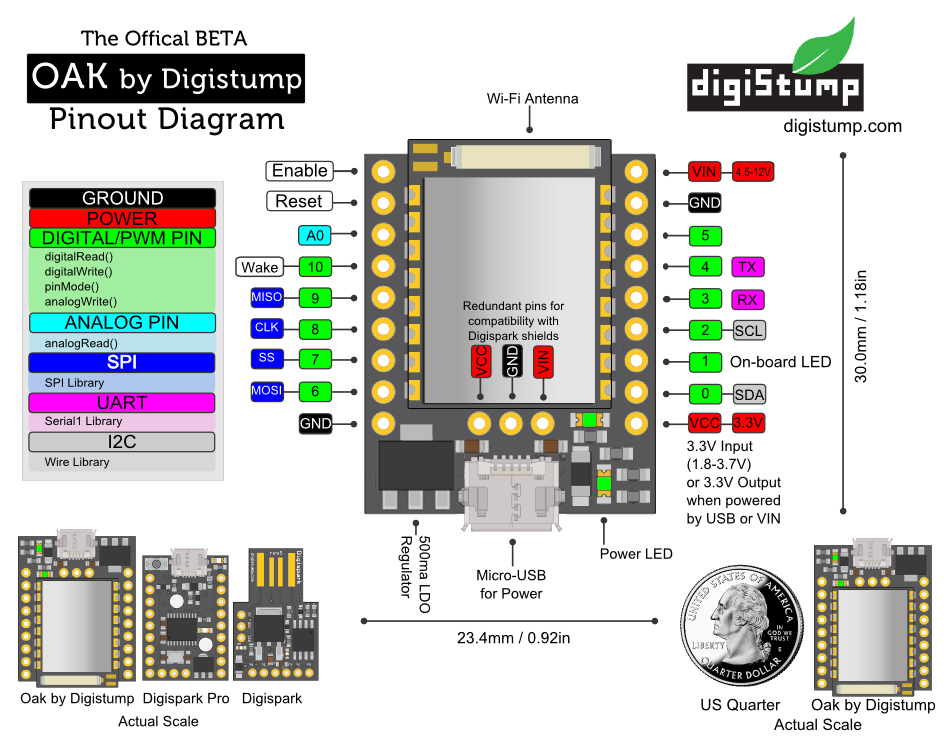
The core of Oak is a 32-bit, 80-MHz, overclockable microprocessor based on the ESP8266 Wi-Fi chip, which is contained in a custom Digistump-made MCU, accompanied by onboard 802.11 b/g/n Wi-Fi radio. Digistump has tried to pull off a neat PCB to fit everything in a convenient form factor that is compact and handy. The board is equipped with 11 digital IO (with PWM) and one analog channel. It also has I2C, UART/Serial, SPI, and micro-USB ports, along with others.
It is actually a two-part device. The Acorn module holds the MCU and Wi-Fi components while a carrier board provides the IO pins, connectors, passive components, and the like. The Acorn is available by itself for quantity purchases, allowing designs based on the Oak to more easily be integrated into other products, and still have full FCC/CE modular approval.

A key feature of the Oak is that is wirelessly programmable. Oak offers over-the-air (OTA) programming so that devices can be configured wirelessly, no matter where in the globe it is. Developers can process code in the cloud or do it locally, then upload it to the remote device. Oak is another of the amazing, growing community of open-source development boards. It is truly Arduino-compatible; hence, it is also possible to program it using the good old Arduino IDE rather than the Particle Cloud, if desired. Happily, Oak is also compatible with most Arduino libraries and over 25 existing Digispark shields.
Hands-on experience
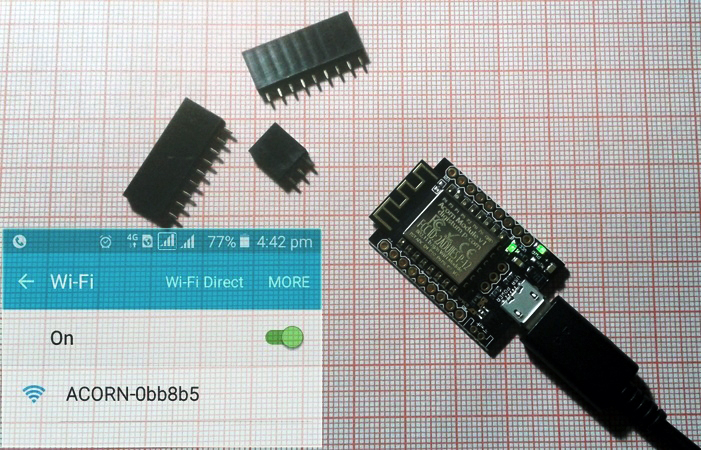
Given all these features, I wanted to try out the Oak to see how it performed. The Kickstarter Edition (v1.0) of the Digistump Oak arrived at my doorstep (from an Indian online store) one week after ordering. I unpacked it and got it up and going in a matter of minutes. It appeared as a Wi-Fi device with SSID “ACORN-0bb8b5” in my Android phone right after initial power-up.

Before taking the next step, I spent some time reading the Digistump Wiki page. The initial setup procedure included in the “getting started” tutorials seemed pretty easy to follow:
- Sign up for a Particle account at https://build.particle.io.
- Plug the Oak into USB power.
- Use a device with Wi-Fi and browser to connect to the Oak.
- Point the browser at http://rawgit.com/digistump/OakSoftAP/master/config.html.
- Follow the posted instructions.
Once I’d completed all of the above, my Oak booted up with a triple-blink pattern on its LED ( see the video), showing that it was in config mode. It was ready for my first code upload.
Early users seem to have had problems with getting their Oak up and running, but with the latest version of the firmware installed on the Oak, you should find it easy to test the development environment. As usual with all microcontrollers, the simplest step is the execution of a “hello world” program that blinks an LED to prove that the program has loaded and is running. The onboard LED of Oak is connected to pin 1, so make use of that with the help of the Arduino IDE or the Particle.io development environment offered by Oak to make sure everything is working.
Be aware of IO restrictions
To prevent problems, make sure you pay attention to some inherent IO restrictions of Oak before moving on. Notice, for instance, that the USB port of the Oak works only as a connector input for power. There is no data connection. Also, sadly, there is only one analog input pin (P11/A0), and out of the 11 digital IO ports, pin 10 (WAKE) is not pulse-width-modulation-capable (PWM-capable).
Furthermore, extreme care is required with some of the IOs. As warned by Digistump, pins 0-1-2-4 of Oak must not be held low at boot, and never attach pull-down resistors to them unless they are only active after power-up. Likewise, pin 6 must not be held high at boot (no pull-up resistor). If you follow these restrictions, however, you should have pretty smooth sailing.
The availability of cheap development boards like the Oak has been a blessing for hobbyists, designers, and makers. Based on my hands-on experience with Digistump Oak, I believe that it is a great solution for practicing or playing with open-source IoT projects.
You might also want to check out these other hands-on reviews:
Hands-on review: Sparky single-board computer for media, VoIP, and standalone computing
Hands-on review: jailbreaking a timer to create an MCU development platform
Advertisement


